例えば何らかの入力待ちで一定時間操作が無ければ画面を閉じるとか、画面の右上に常に時刻を表示するなど、メインの処理とは別に、一定時間ごとに何かの処理を行いたい場合、Timerを利用することで簡単に実現できます。
この記事では、WPFでTimer処理を行う方法について、実際のサンプルを例に解説したいと思います。
Timerの作り方
プログラム冒頭に次の参照設定を入れてください。
using System.Windows.Threading;あとは、下図の通りTimerインスタンスを生成し、Interval プロパティに「時間間隔」を、Tickイベントに「呼び出された時の処理」を登録するだけです。
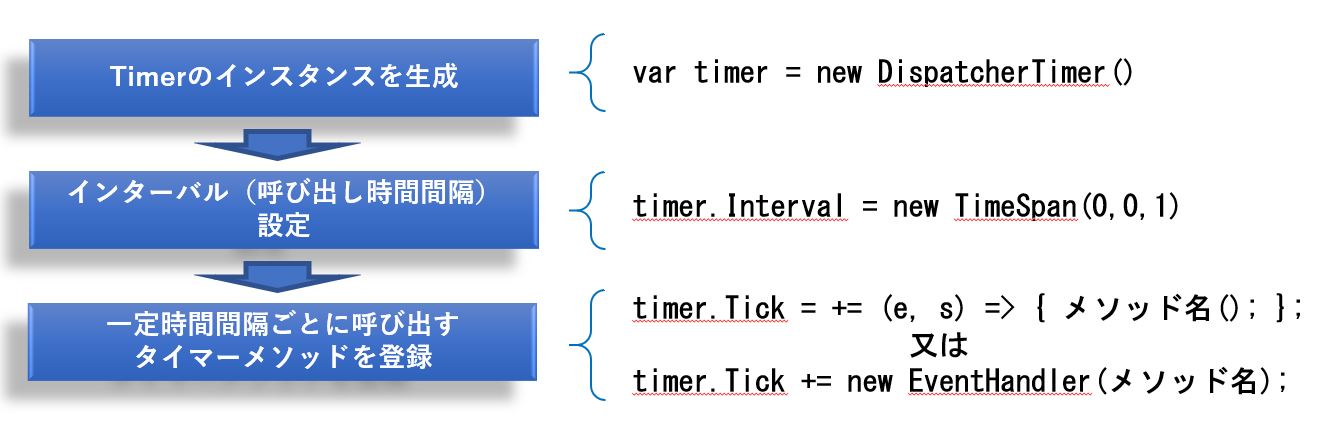
尚、「呼び出された時の処理」の優先順位は Timerのインスタンス生成時の引数で指定できます。
DispatcherPriority列挙体を使うのですが、優先順位を低く(バックグラウンドで処理)したい時は、DispatcherPriority.Backgroundを、優先順位を高く(レンダリングと同じ優先順位で処理)したい場合は DispatcherPriority.Send を指定します。
その他にも様々な優先順位が用意されていますので、詳しくはこちらを参照下さい。
Timer の開始と停止
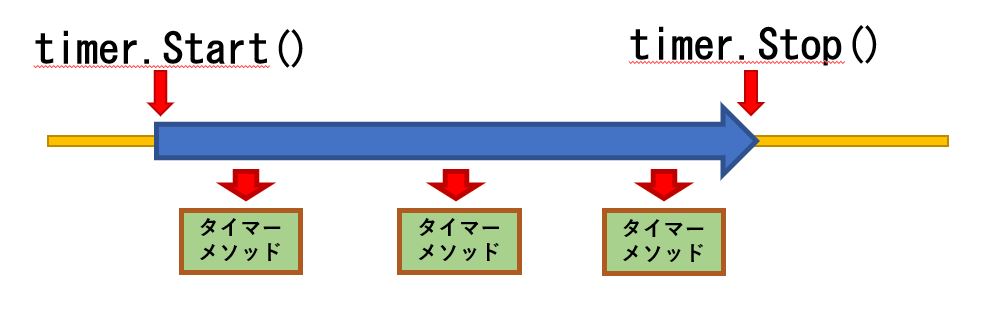
Timerの開始と終了は、それぞれ Start() メソッド、 Stop()メソッドを使います。
例えば timer というインスタンスを生成した場合、次のようになります。
プログラムが終了する際にTimer を止めなくても大丈夫なのですが、あまり行儀がよくないので、必要に応じて画面のCloseイベントにタイマーを停止する処理を入れた方が良いでしょう。
this.Closing += (s,e) => { timer.Stop(); };使用上の注意
タイマー割り込みの中で時間の掛かる処理を行う場合、画面の処理が重くなってフリーズしたかのようになってしまいます。
もし、そのような重い処理を記述するのであれば、こちらの記事で紹介したような方法で別スレッド化することを検討してください。
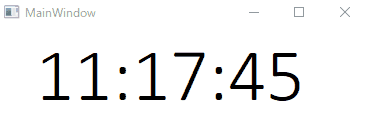
時計のサンプル
では、Timerを使った時計のサンプルプログラムを紹介します。
画面は次のようになります。
XAMLのソースコードは次の通りです。
< Window x: Class = "TimerTest.MainWindow"
        xmlns = "http://schemas.microsoft.com/winfx/2006/xaml/presentation"
        xmlns: x = "http://schemas.microsoft.com/winfx/2006/xaml"
        xmlns: d = "http://schemas.microsoft.com/expression/blend/2008"
        xmlns: mc = "http://schemas.openxmlformats.org/markup-compatibility/2006"
        xmlns: local = "clr-namespace:TimerTest"
        mc: Ignorable = "d"
        Title = "MainWindow" Height = "128.356" Width = "387.752" >

        < Grid >
            < Viewbox Stretch = "Uniform" Grid.Row = "0"  HorizontalAlignment = "Center" VerticalAlignment = "Center" >
                       < StackPanel Orientation = "Horizontal" >
                            < TextBlock x: Name = "uxClock" TextWrapping = "Wrap" Text = "00:00:00"  FontFamily = "Harlow Solid Italic" FontSize = "50" Height = "59" Width = "194" />
            </ Viewbox >
        </ Grid >
</ Window >
C#のソースコードは次の通りです。
using System;
using System.Collections.Generic;
using System.Linq;
using System.Text;
using System.Threading.Tasks;
using System.Windows;
using System.Windows.Controls;
using System.Windows.Data;
using System.Windows.Documents;
using System.Windows.Input;
using System.Windows.Media;
using System.Windows.Media.Imaging;
using System.Windows.Navigation;
using System.Windows.Shapes;
using System.Windows.Threading;
using System.ComponentModel;

namespace TimerTest
{
    /// <summary>
    /// MainWindow.xaml の相互作用ロジック
    /// </summary>
    public partial class MainWindow : Window
    {
        private DispatcherTimer _timer;
        public MainWindow()
        {
            InitializeComponent();
            InitializeTimer();
        }

        private void InitializeTimer()
        {
            // 優先順位を指定してタイマのインスタンスを生成
            _timer = new DispatcherTimer(DispatcherPriority.Background);

            // インターバルを設定
            _timer.Interval = new TimeSpan(0, 0, 1);

            // タイマメソッドを設定
            _timer.Tick += (e, s) => { TimerMethod(); };

            // 画面が閉じられるときに、タイマを停止
            this.Closing += (e, s) => { _timer.Stop(); };

            _timer.Start();
        }

        private void TimerMethod()
        {
            uxClock.Text = DateTime.Now.ToString("hh:mm:ss");
        }

    }

}
複数タイマーの利用
当然ながら、タイマーを複数個用意し、それぞれ違う時間間隔で使用することも可能です。
先ほど紹介した InitializeTimer() メソッドの中身を複数回記述すればよいのですが、プログラムが煩雑になりますので、メソッド化してみましょう。
引数にインターバル(時間間隔)と任意のタイマーメソッド(時間間隔ごとに呼び出したいメソッド)を渡すと、Timerインスタンスを返すCreateTimer メソッドを作ってみました。
第1引数にはインターバルをミリ秒単位で指定、第2引数には呼び出したいメソッドを指定します。
private DispatcherTimer CreateTimer(int interval,Action action)
{
    // 優先順位を指定してタイマのインスタンスを生成
    DispatcherTimer timer = new DispatcherTimer(DispatcherPriority.Background);

    // インターバルを設定
    timer.Interval = new TimeSpan(0,0,0,0,interval);

    // タイマメソッドを設定
    timer.Tick += (e, s) => { action(); };

    // 画面が閉じられるときに、タイマを停止
    this.Closing += (e, s) => { timer.Stop(); };

    return timer;
}
このメソッドの使い方は次の通りです。
var timer1 = CreateTimer(1000,TimerMethod1);
timer1.Start();
var timer2 = CreateTimer(200,TimerMethod2);
timer2.Start();
では、これを使った時計のサンプルプログラムを紹介します。
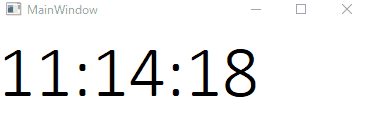
複数タイマーを使った時計サンプル
下記の画面は、1ミリ秒ごとに時計を表示し、200ミリ秒間隔で赤丸を点灯、500ミリ秒間隔で青丸を転送させるサンプル画面です。
XAMLは次のようになります。
<Window x:Class="TimerTest.MainWindow"
        xmlns="http://schemas.microsoft.com/winfx/2006/xaml/presentation"
        xmlns:x="http://schemas.microsoft.com/winfx/2006/xaml"
        xmlns:d="http://schemas.microsoft.com/expression/blend/2008"
        xmlns:mc="http://schemas.openxmlformats.org/markup-compatibility/2006"
        xmlns:local="clr-namespace:TimerTest"
        mc:Ignorable="d"
        Title="MainWindow" Height="128.356" Width="387.752">
    <Grid>
        <Viewbox Stretch="Uniform" Grid.Row="0"  HorizontalAlignment="Center" VerticalAlignment="Center">
            <StackPanel Orientation="Horizontal" >
                <TextBlock x:Name="uxClock" TextWrapping="Wrap" Text="00:00:00" FontFamily="Calibri Light" FontSize="50" Height="59" Width="194"/>
                <TextBlock x:Name="uxMarker1" Width="30" Text="●" Foreground="Red" Visibility="Collapsed"/>
                <TextBlock x:Name="uxMarker2" Width ="30" Text="●" Foreground="Blue" Visibility="Collapsed"/>
            </StackPanel>
        </Viewbox>
    </Grid>
</Window>
C#のソースコードは以下の通りです。
using System;
using System.Collections.Generic;
using System.Linq;
using System.Text;
using System.Threading.Tasks;
using System.Windows;
using System.Windows.Controls;
using System.Windows.Data;
using System.Windows.Documents;
using System.Windows.Input;
using System.Windows.Media;
using System.Windows.Media.Imaging;
using System.Windows.Navigation;
using System.Windows.Shapes;
using System.Windows.Threading;
using System.ComponentModel;

namespace TimerTest
{
    /// <summary>
    /// MainWindow.xaml の相互作用ロジック
    /// </summary>
    public partial class MainWindow : Window
    {
        public MainWindow()
        {
            InitializeComponent();

            var timer1 = CreateTimer(1,TimerMethod);
            timer1.Start();

            var timer2 = CreateTimer(200, ()=>uxMarker1.Text = (uxMarker1.Text == "●" ? " " : "●"));
            timer2.Start();

            var timer3 = CreateTimer(500, () => uxMarker2.Text = (uxMarker2.Text == "●" ? "" : "●"));
            timer3.Start();
        }

        private DispatcherTimer CreateTimer(int interval,Action action)
        {
            // 優先順位を指定してタイマのインスタンスを生成
            DispatcherTimer timer = new DispatcherTimer(DispatcherPriority.Background);

            // インターバルを設定
            timer.Interval = new TimeSpan(0,0,0,0,interval);

            // タイマメソッドを設定
            timer.Tick += (e, s) => { action(); };

            // 画面が閉じられるときに、タイマを停止
            this.Closing += (e, s) => { timer.Stop(); };

            return timer;
        }

        private void TimerMethod()
        {
            uxClock.Text = DateTime.Now.ToString("hh:mm:ss");
        }

    }

}
まとめ
今回はTimerによる割り込み処理(一定時間間隔での処理実行)について、その手順とタイマーの開始、終了、そして複数タイマーを同時に使う場合に便利なメソッド化について解説してみました。
重い処理の場合は画面がフリーズしたようになるので注意が必要ですが、時計表示やカウントダウンなどの軽い処理だと気軽に使えますので、皆さんのプログラムで応用してみてください。