ディープラーニングを用いた画像認識の場合、通常、膨大な量の学習用画像を用意する必要があります。しかし、現実的には多くの学習用画像を収集することは困難です。
そこで、わずか数枚から数百枚の画像を元に、さまざまな画像処理手法を組み合わせて数万から数十万の学習用画像を生成するアプローチが一般的に用いられます。
今回は、PythonとOpenCVを使用して手軽に実行できるImage Augmentation(画像データの水増し、データ拡張)に関する方法を、サンプルソースコードを交えて紹介したいと考えています。
代表的な Image Augmentation の関数
OpenCVで代表的な Image Augmentation には、次のものがあります。
| 処理名 | 概要 | 関数名 |
|---|---|---|
| 回転 | 画像を指定した角度だけ回転させる | cv2.getRotationMatrix2D() |
| 反転 | 画像を反転させる | cv2.flip() |
| 平行移動 | 上下左右に平行移動させる | cv2.warpAffine() |
| 変形(台形) | 画像を台形に変形させる | cv2.getPerspectiveTransform() |
| 変形(魚眼) | 画像に魚眼レンズを適用する | cv2.rema() |
| 変形(正弦波) | 画像に正弦波歪を適用する | cv2.rema() |
| クロップ | 画像の一部を切り取る | - |
| リサイズ | 画像のサイズを変更 | cv2.resize() |
| コントラストと明るさ | 画像のコントラストと明るさを変更 | cv2.convertScaleAbs() |
| 彩度 | 画像の彩度を変更 | cv2.cvtColor() |
| 拡散(ディフューザー効果) | 画像にディフューザを適用 | - |
| レンズフレア | 画像にレンズフレアを適用 | - |
| 影 | 画像に影を追加 | - |
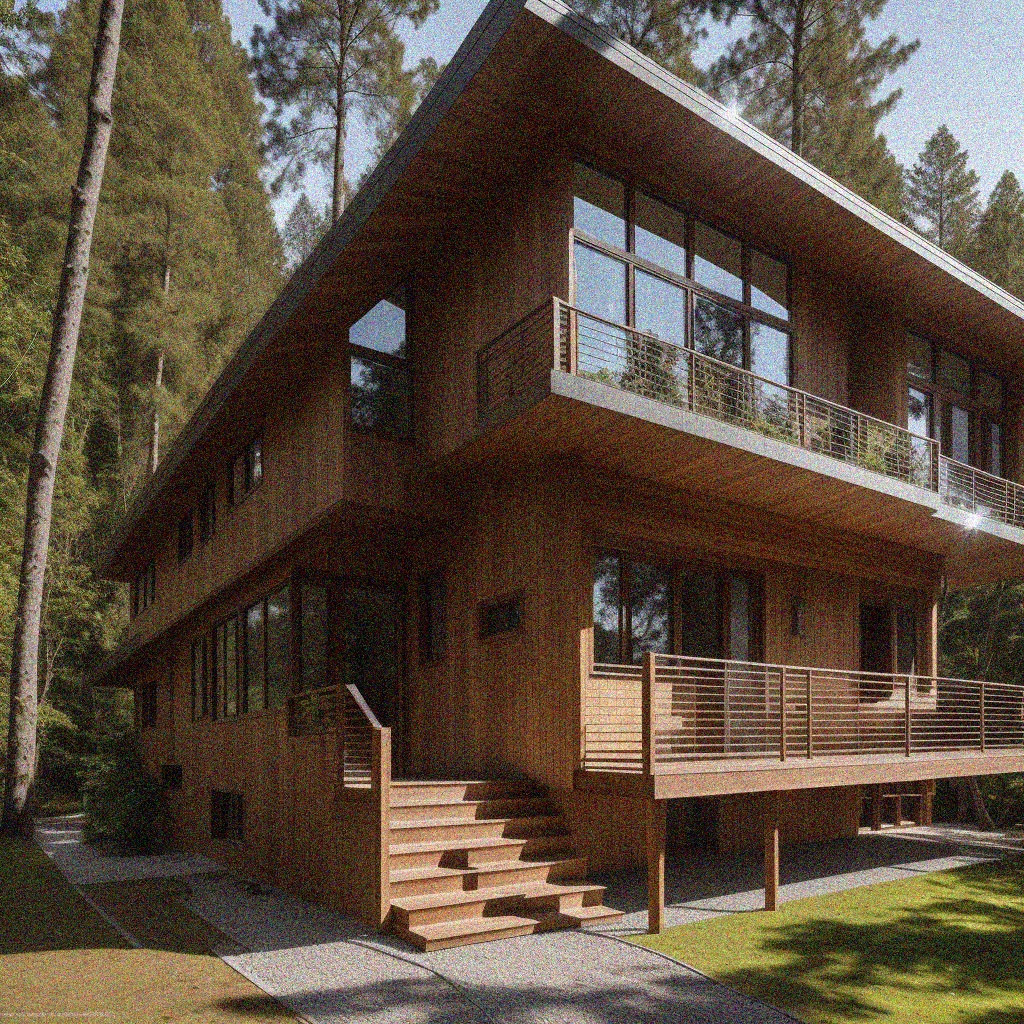
| ノイズ追加(ガウシアン) | 画像にガウシアンノイズを追加 | - |
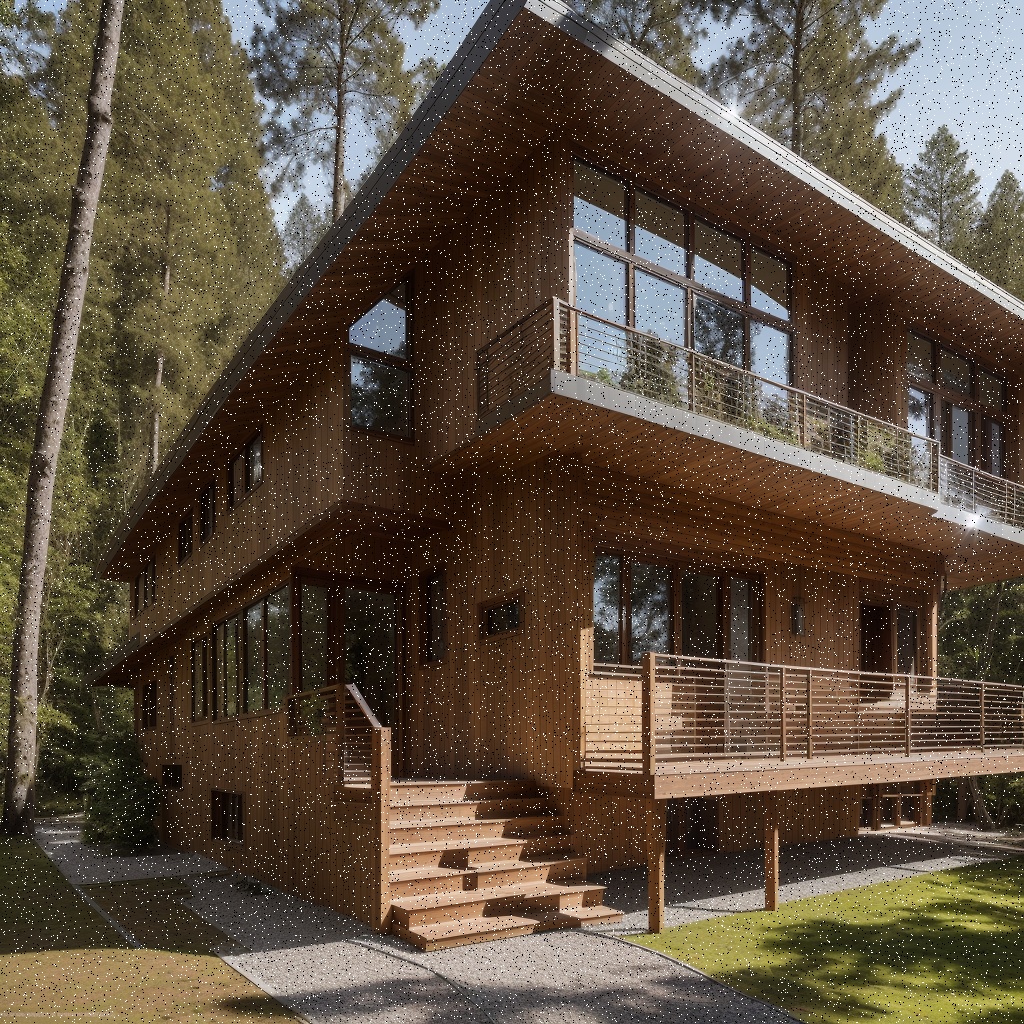
| ノイズ追加(塩・胡椒) | 画像に塩・胡椒ノイズを追加 | - |
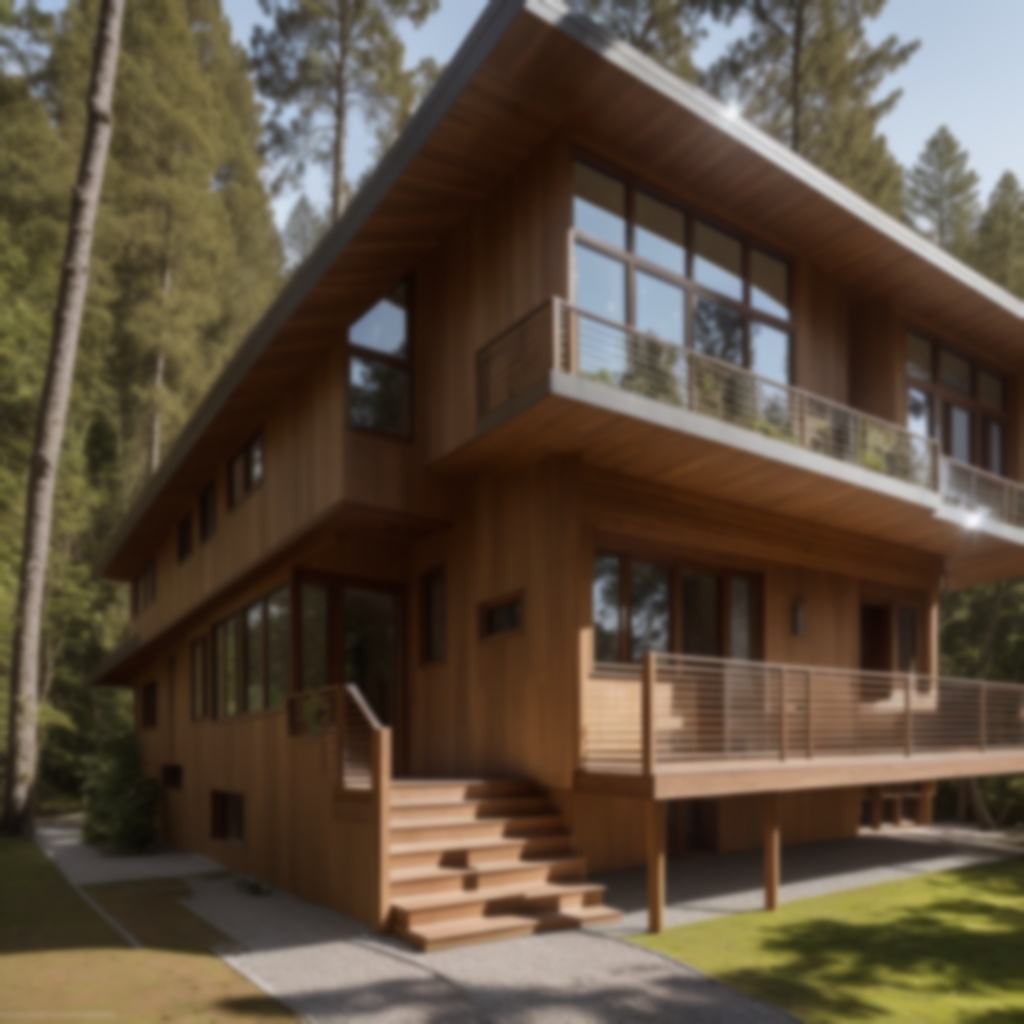
| ぼかし(ガウシアン) | 画像にガウシアンぼかしを適用 | cv2.GaussianBlur() |
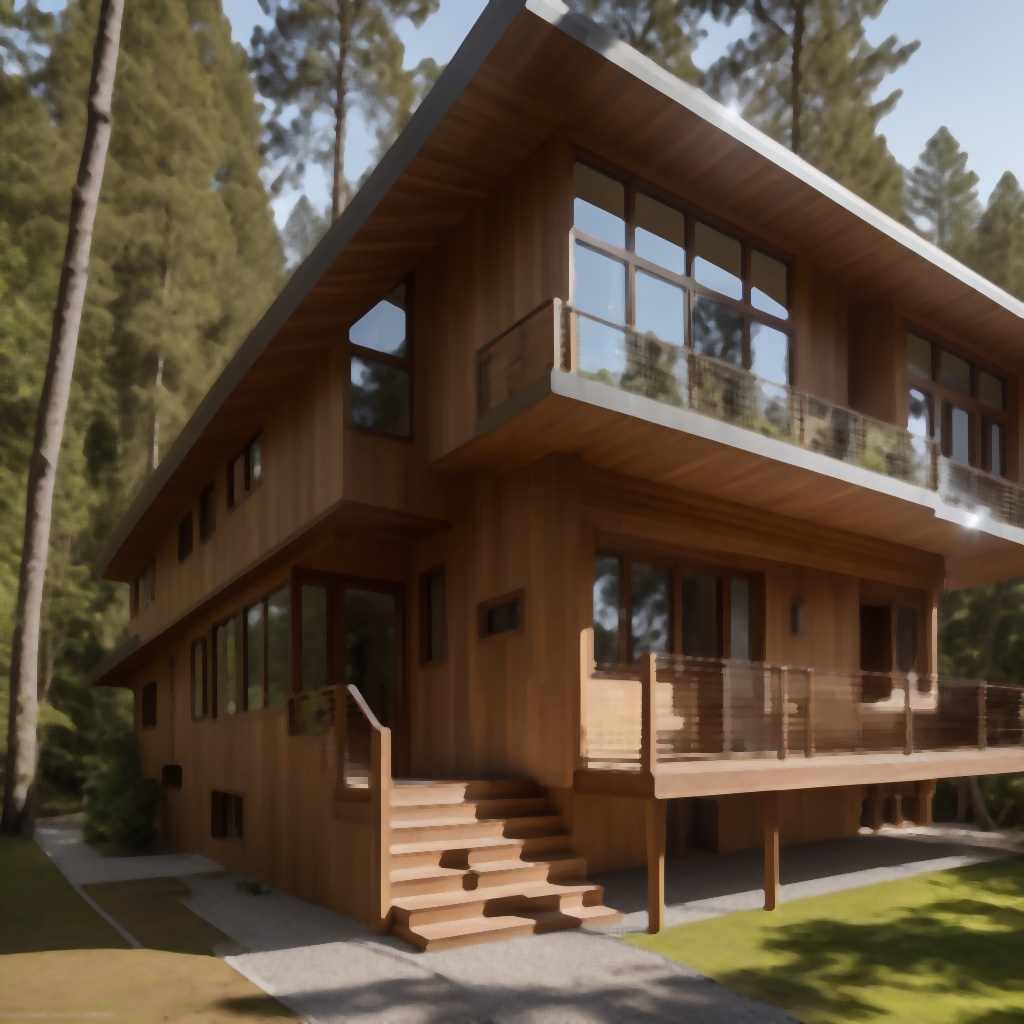
| ぼかし(メディアン) | 画像にメディアンぼかしを適用 | cv2.medianBlur() |
| 手振れ(モーションブラー) | 画像にモーションブラーを適用 | - |
| 霧 | 画像に霧の効果を適用 | - |
| 雨(雨粒) | 画像に雨粒の効果を適用 | - |
関数の意味と使い方サンプル
ここでは、処理ごとのサンプルプログラムを紹介します。関数として作っていますので、必要なものをコピペしてお使い頂けます。
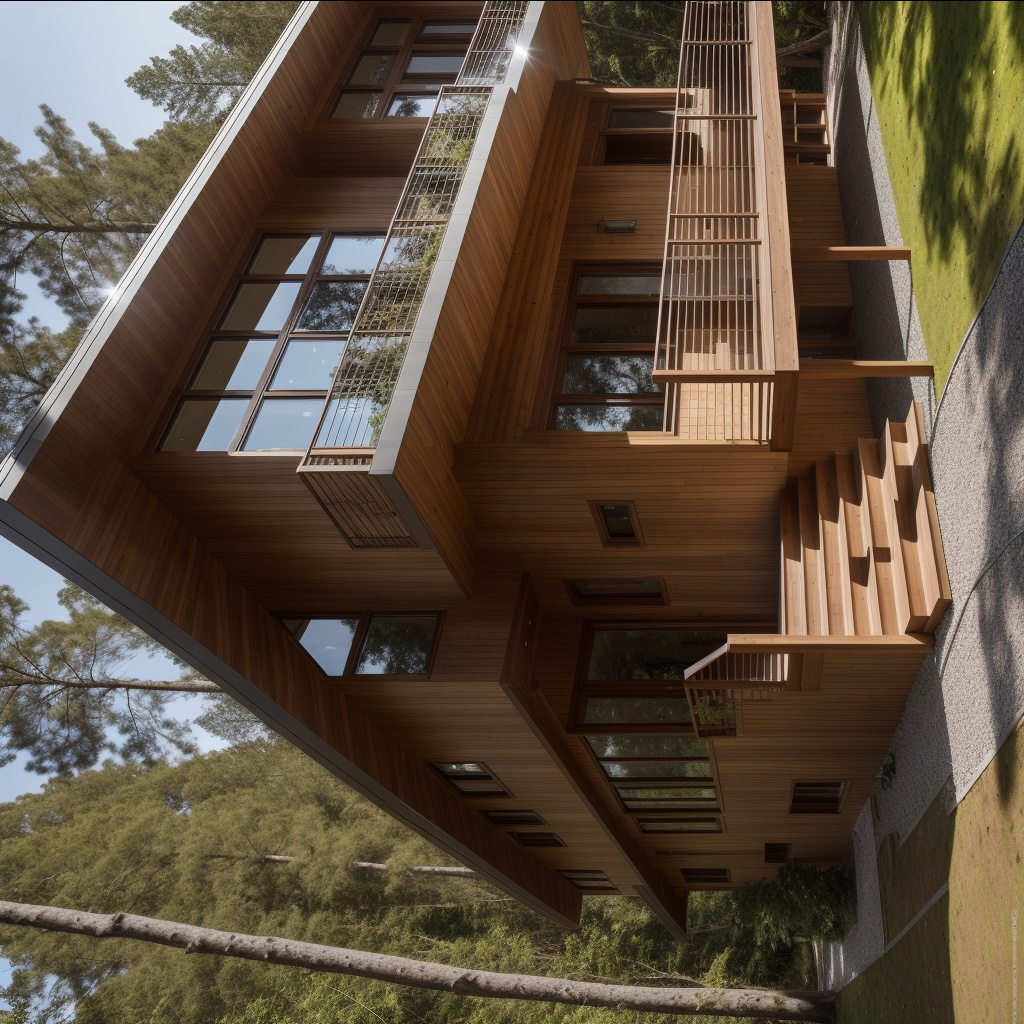
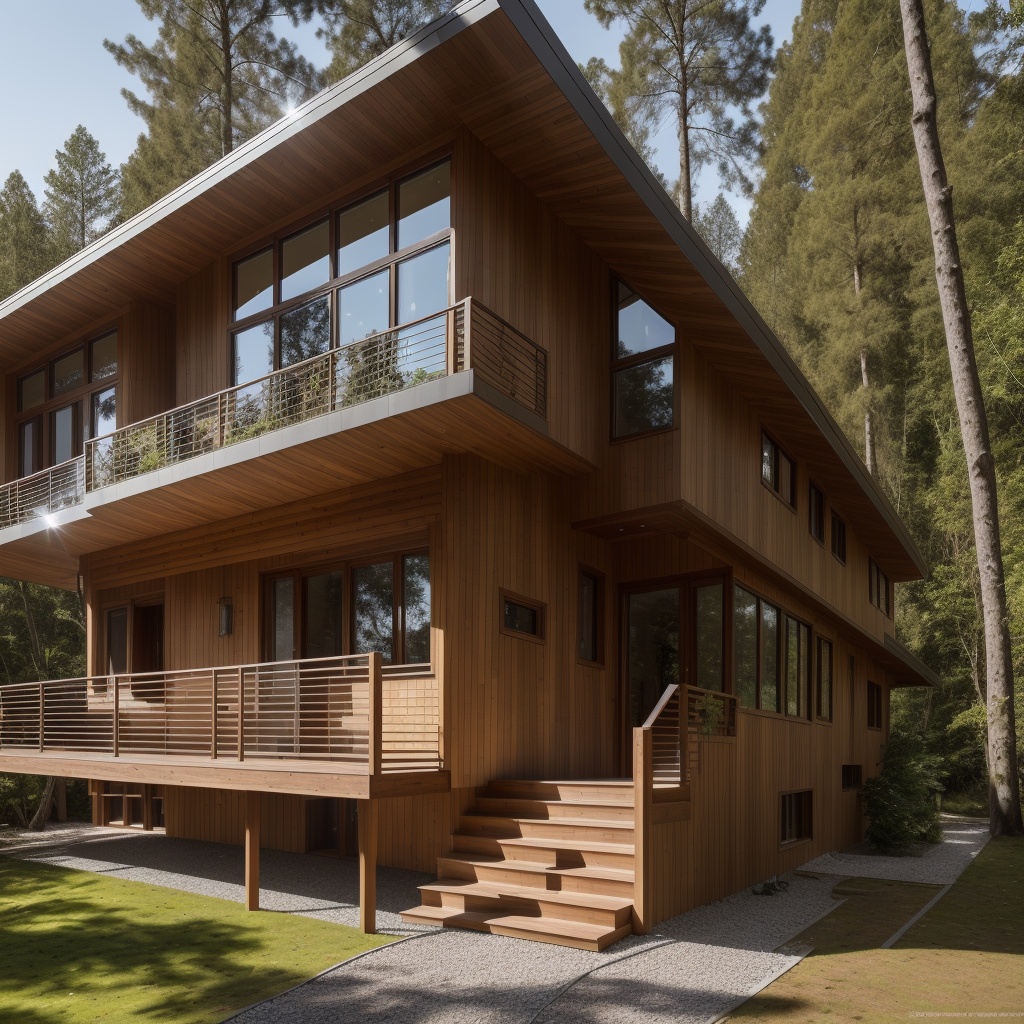
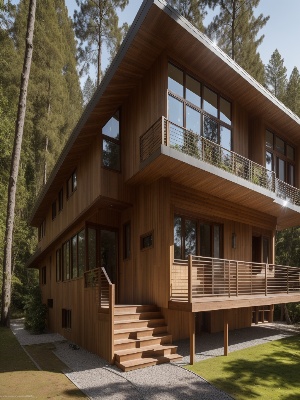
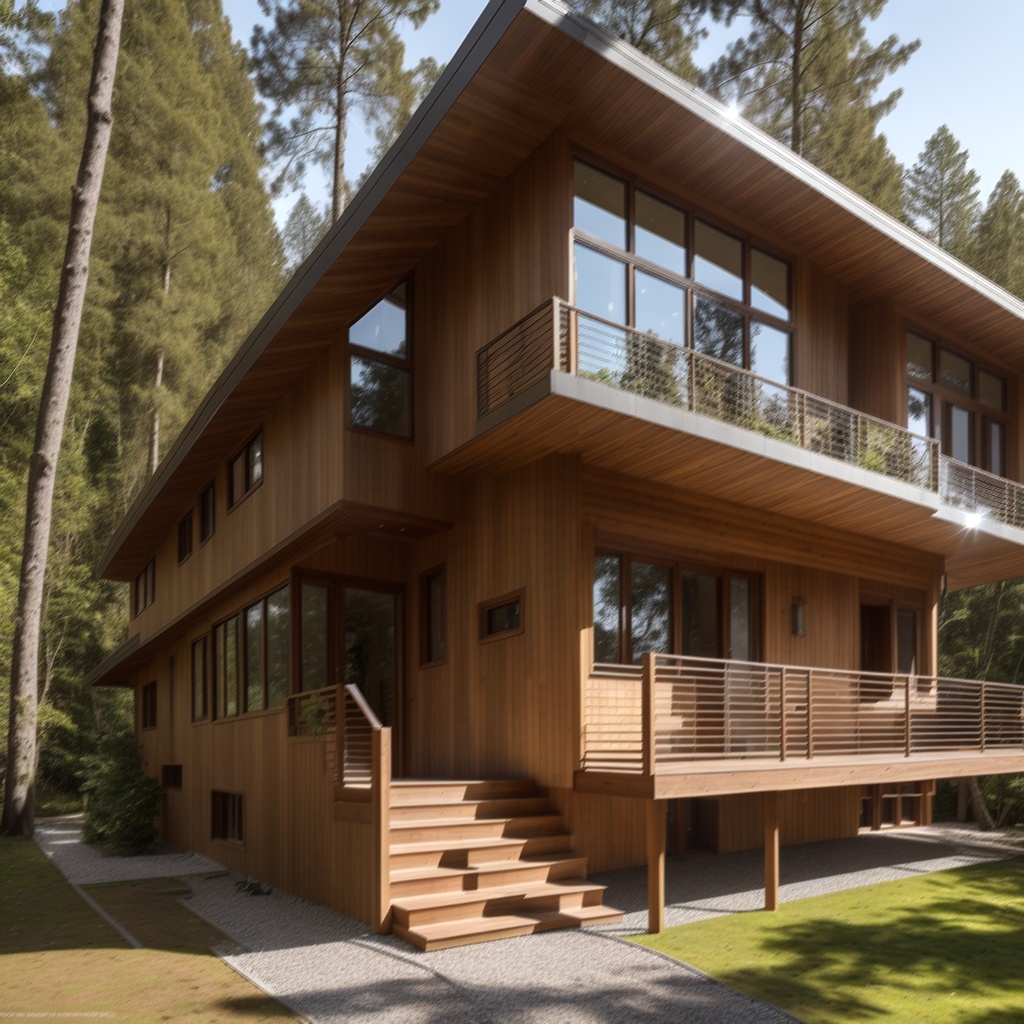
今回評価に使ったのは以下の画像です。
サンプルプログラム実行時の注意点
各サンプルプログラムは画像の読み込みと保存の処理を記述していますが、共にOドライブ直下に画像ファイルがあり、結果をそこに保存するようになっています。
具体的には "O:\input_image.jpg" を読み込み、"O:\output_image.jpg" に 保存しています。パスやファイル名は、皆さんの環境に適宜合わせて下さい。
また、動作に必要なライブラリ(Cv2や numpy)のimport を記述していません。実行する場合は、下記2つのimport 文を先頭に記述しておいてください。
import cv2
import numpy as np
画像の回転
与えられた画像データを指定した角度だけ回転させて新しい画像データを生成します。
def rotate_image(image, angle):
    """
    与えられた画像データを指定した角度だけ回転させる関数。

    Parameters:
        image (numpy.ndarray): 入力画像データ (BGRカラー画像)
        angle (float): 回転角度(度数法)

    Returns:
        numpy.ndarray: 回転後の新しい画像データ
    """
    height, width = image.shape[:2]
    center = (width / 2, height / 2)

    # 回転行列を取得
    rotation_matrix = cv2.getRotationMatrix2D(center, angle, 1)

    # 画像を回転
    rotated_image = cv2.warpAffine(image, rotation_matrix, (width, height))

    return rotated_image

# 画像ファイルを読み込み
image = cv2.imread('o:/input_image.jpg')

# 画像を90度回転させる
angle_to_rotate = 90
image = rotate_image(image, angle_to_rotate)

# 画像を保存
cv2.imwrite('o:/output_image.jpg', image )
反転
与えられた画像データを水平方向または垂直方向に反転させて新しい画像データを生成します。
def flip_image(image, flip_code):
    """
    与えられた画像データを水平方向または垂直方向に反転させる関数。

    Parameters:
        image (numpy.ndarray): 入力画像データ (BGRカラー画像)
        flip_code (int): 反転コード。1は水平方向、0は垂直方向、-1は両方向

    Returns:
        numpy.ndarray: 反転後の新しい画像データ
    """
    flipped_image = cv2.flip(image, flip_code)
    return flipped_image

# 画像ファイルを読み込み
image = cv2.imread('o:/input_image.jpg')

# 画像を水平方向に反転させる
flip_code_horizontal = 0
flipped_horizontal_image = flip_image(image, flip_code_horizontal)

# 画像を垂直方向に反転させる
flip_code_vertical = 1
image = flip_image(image, flip_code_vertical)

# 画像を保存
cv2.imwrite('o:/output_image.jpg', image )
平行移動
オリジナル
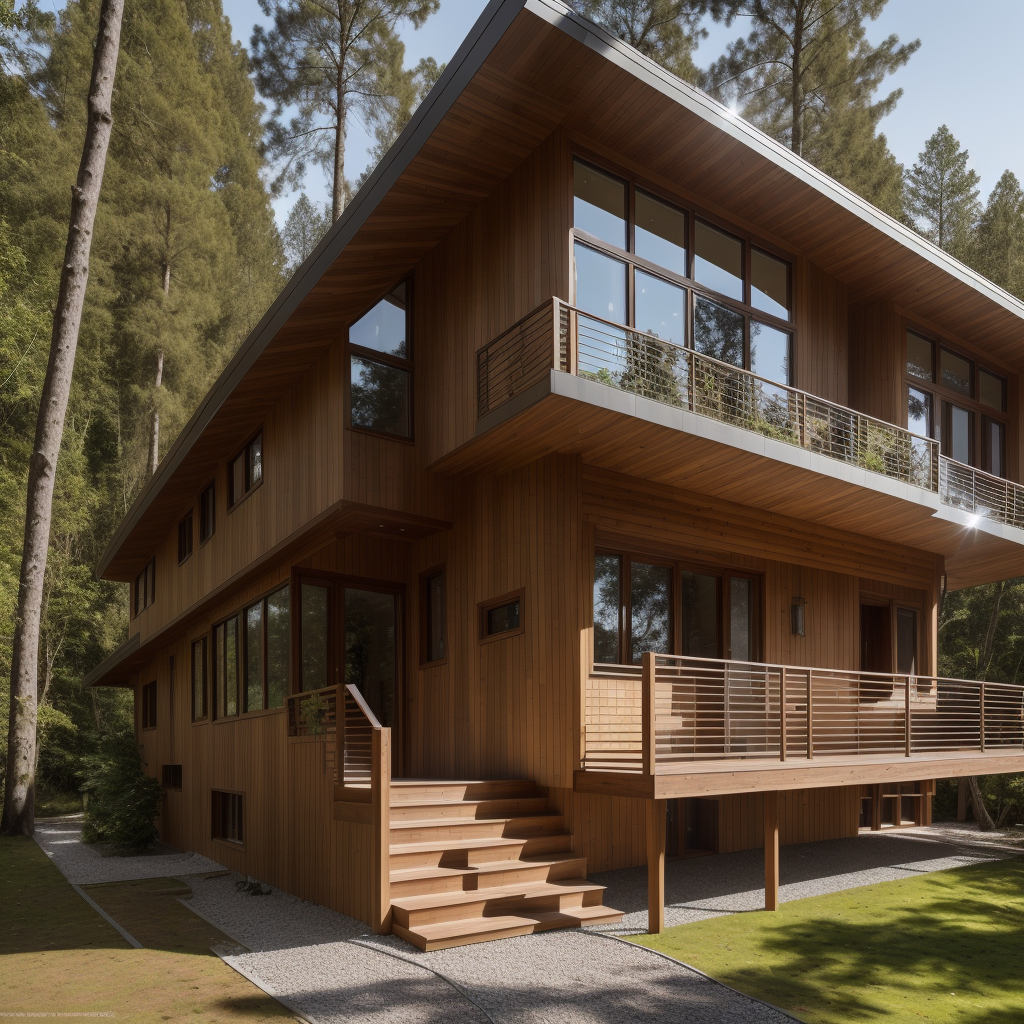
画像処理後
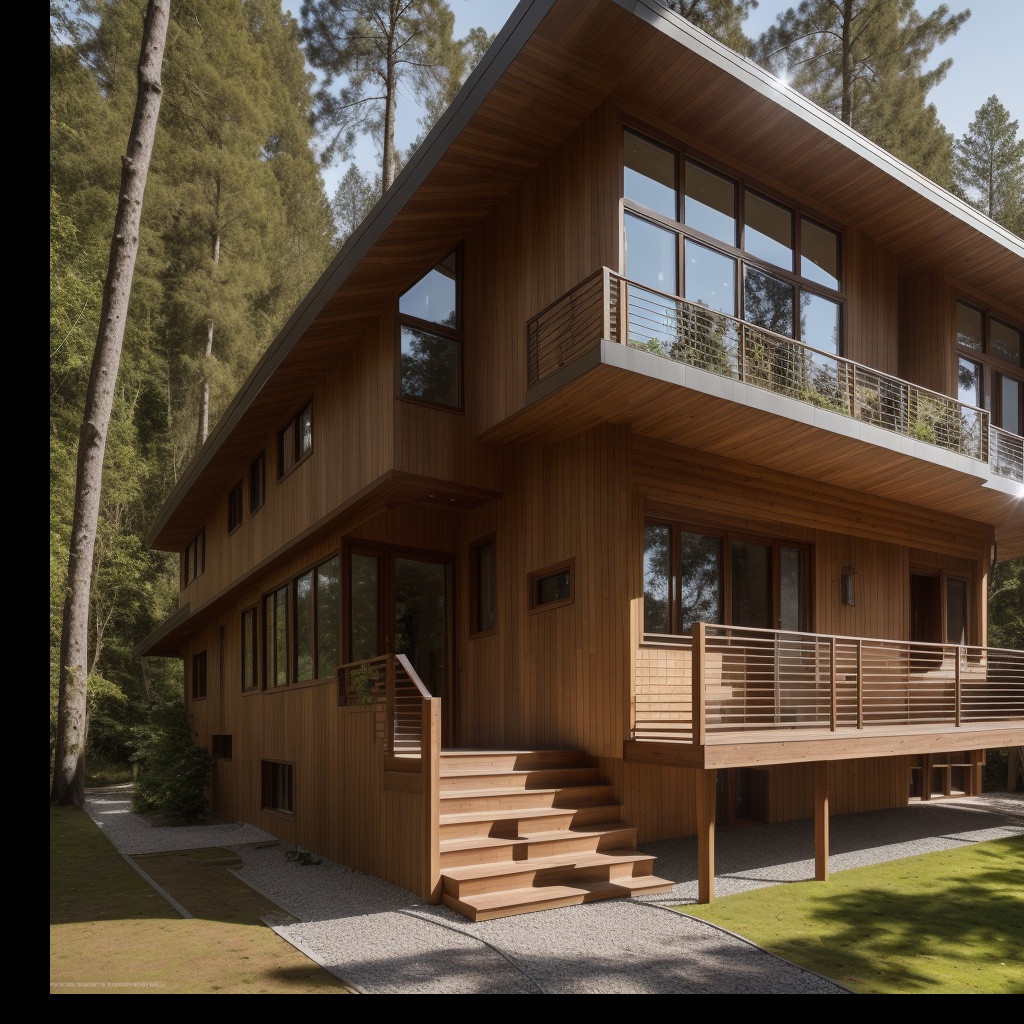
与えられた画像データを水平方向または垂直方向に平行移動させて新しい画像データを生成します。
def apply_parallel_translation(image, x_offset, y_offset):
    """
    与えられた画像を指定された方向に平行移動させる関数。

    Parameters:
        image (numpy.ndarray): 入力画像データ (BGRカラー画像)
        x_offset (int): X方向の平行移動量 (正の値は右に移動、負の値は左に移動)
        y_offset (int): Y方向の平行移動量 (正の値は下に移動、負の値は上に移動)

    Returns:
        numpy.ndarray: 平行移動された新しい画像データ
    """
    height, width = image.shape[:2]

    # 平行移動行列を定義
    translation_matrix = np.float32([[1, 0, x_offset], [0, 1, y_offset]])

    # 平行移動後の画像を生成
    translated_image = cv2.warpAffine(image, translation_matrix, (width, height))

    return translated_image

# 画像ファイルを読み込み
image = cv2.imread('o:/input_image.jpg')

# 平行移動量を指定(正の値は右や下に移動、負の値は左や上に移動)
x_offset = 50  # 右に50ピクセル移動
y_offset = -30  # 上に30ピクセル移動

# 平行移動させた画像を生成
image = apply_parallel_translation(image, x_offset, y_offset)

# 画像を保存
cv2.imwrite('o:/output_image.jpg', image )
変形(台形)
オリジナル

画像処理後
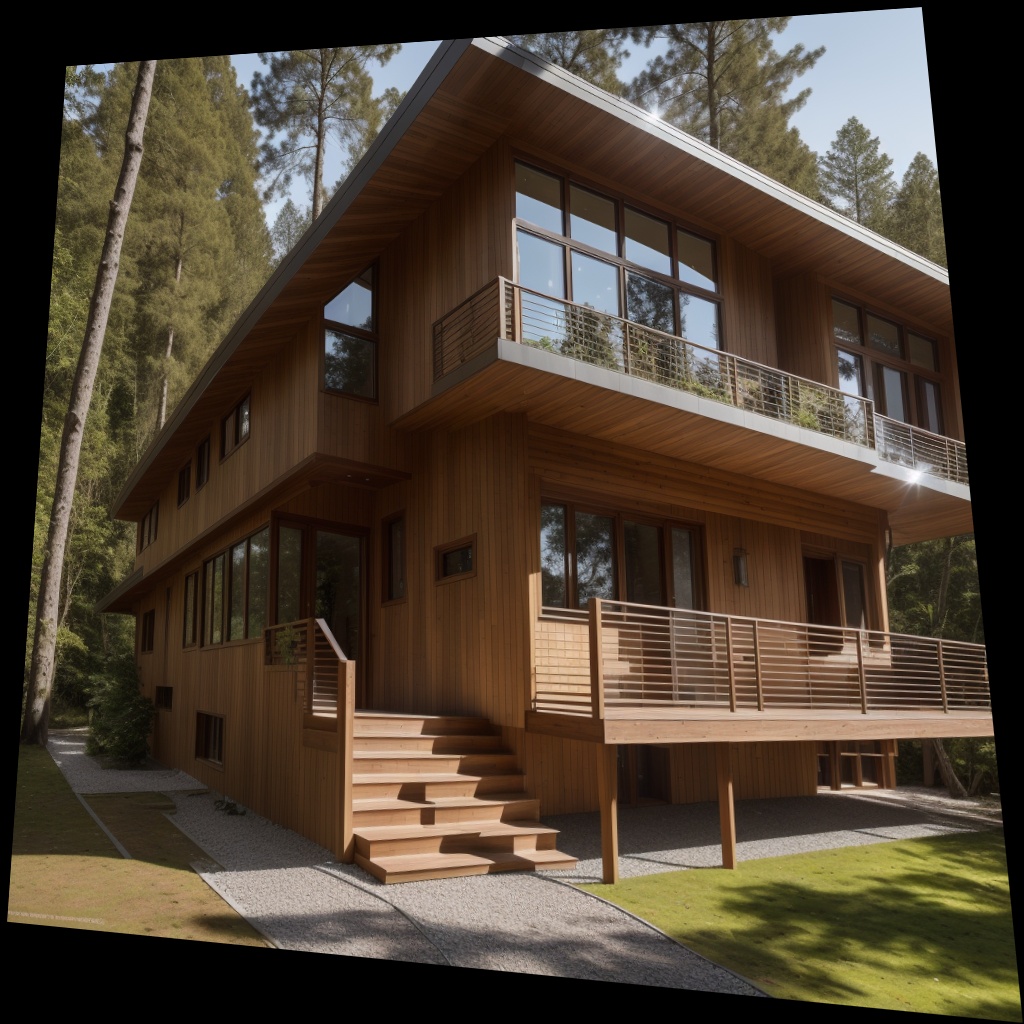
与えられた画像データを指定して割合で台形に変形し、新しい画像データを生成します。
def apply_custom_trapezoid_distortion(image, top_percentage, bottom_percentage, left_percentage, right_percentage):
    """
    与えられた画像を指定された割合で台形に変形させる関数。

    Parameters:
        image (numpy.ndarray): 入力画像データ (BGRカラー画像)
        top_percentage (float): 上部の台形変形割合(正の値は上が広がり、負の値は上が狭まる)
        bottom_percentage (float): 下部の台形変形割合(正の値は下が狭まり、負の値は下が広がる)
        left_percentage (float): 左側の台形変形割合(正の値は左が広がり、負の値は左が狭まる)
        right_percentage (float): 右側の台形変形割合(正の値は右が狭まり、負の値は右が広がる)

    Returns:
        numpy.ndarray: 台形に変形された新しい画像データ
    """

    height, width = image.shape[:2]

    # 各方向の台形の上部、下部、左、右の長さを計算
    trapezoid_top = int(width * top_percentage)
    trapezoid_bottom = int(width * bottom_percentage)
    trapezoid_left = int(height * left_percentage)
    trapezoid_right = int(height * right_percentage)

    # 変換前後の座標を定義
    src_points = np.float32([(trapezoid_top, trapezoid_left),
                             (width - trapezoid_top, trapezoid_right),
                             (trapezoid_bottom, height - trapezoid_left),
                             (width - trapezoid_bottom, height - trapezoid_right)])
    dst_points = np.float32([[0, 0], [width - 1, 0], [0, height - 1], [width - 1, height - 1]])

    # 変換行列を計算
    perspective_matrix = cv2.getPerspectiveTransform(src_points, dst_points)

    # 変換後の画像サイズを計算
    max_width = width
    max_height = height

    # 変換後の画像を生成
    trapezoid_image = cv2.warpPerspective(image, perspective_matrix, (max_width, max_height))

    return trapezoid_image

# 画像ファイルを読み込み
image = cv2.imread('o:/input_image.jpg')

# 各方向の台形の割合を指定(正の値は上方向または右方向に歪むことを意味し、負の値は下方向または左方向に歪むことを意味します)
top_percentage = -0.1  # 上が歪む
bottom_percentage = 0  # 下が歪む
left_percentage =-0.1  # 左が歪む
right_percentage = 0 # 右が歪む

# 各方向に台形変形させた画像を生成
image = apply_custom_trapezoid_distortion(image, top_percentage, bottom_percentage, left_percentage, right_percentage)

# 画像を保存
cv2.imwrite('o:/output_image.jpg', image )
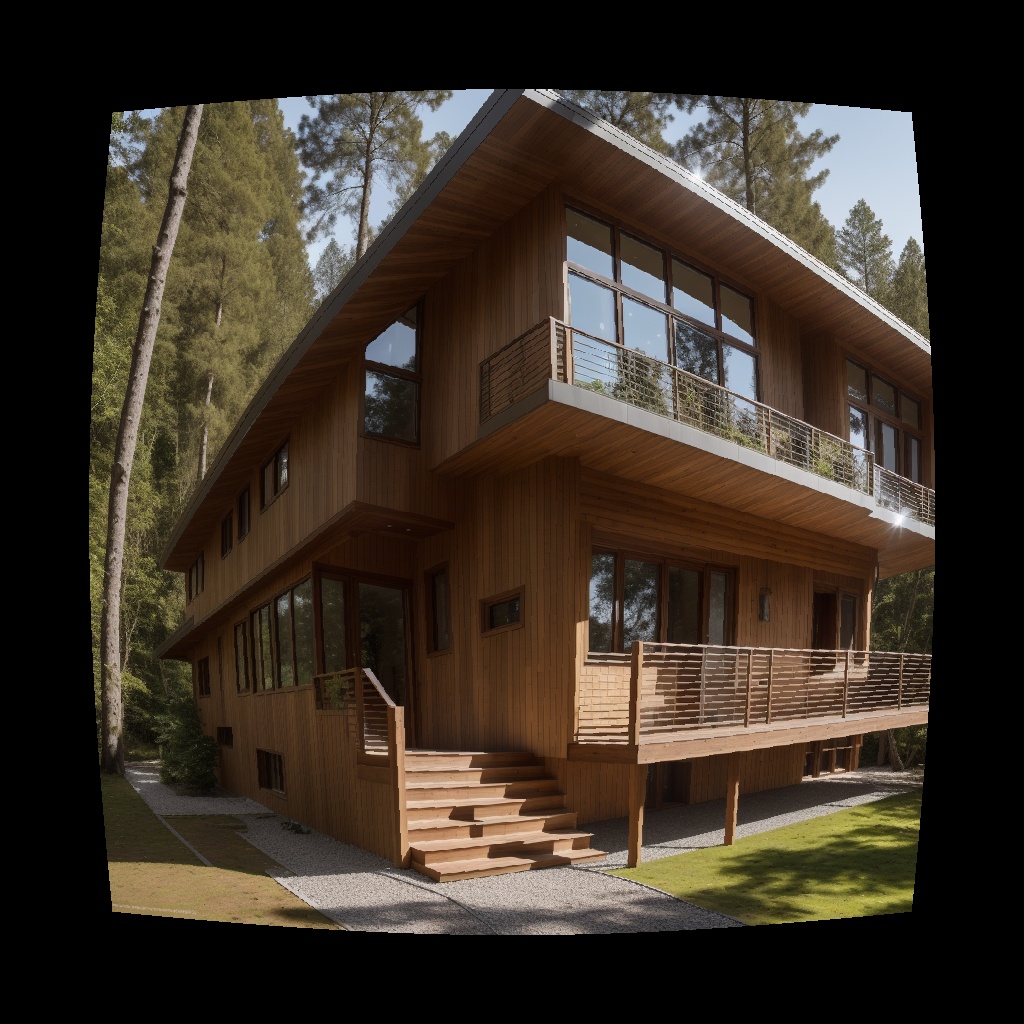
変形(魚眼)
与えられた画像データをに魚眼レンズの歪を適用し、新しい画像データを生成します。
def apply_fisheye_distortion(image, distortion_factor):
    height, width = image.shape[:2]
    center_x = width / 2
    center_y = height / 2

    # 変換マップを生成
    map_x = np.zeros((height, width), np.float32)
    map_y = np.zeros((height, width), np.float32)

    for y in range(height):
        for x in range(width):
            dx = x - center_x
            dy = y - center_y
            r = np.sqrt(dx**2 + dy**2)

            theta = np.arctan2(dy, dx)
            r_distorted = r + distortion_factor * r**2

            map_x[y, x] = int(center_x + r_distorted * np.cos(theta))
            map_y[y, x] = int(center_y + r_distorted * np.sin(theta))

    # 画像を歪曲させる
    distorted_image = cv2.remap(image, map_x, map_y, interpolation=cv2.INTER_LINEAR)

    return distorted_image


# 画像ファイルを読み込み
image = cv2.imread('o:/input_image.jpg')

# フィッシュアイ歪みのパラメータ
distortion_factor = 0.0005

# フィッシュアイ歪みを適用
image = apply_fisheye_distortion(image, distortion_factor)

# 画像を保存
cv2.imwrite('o:/output_image.jpg', image )
変形(正弦波)
オリジナル

画像処理後
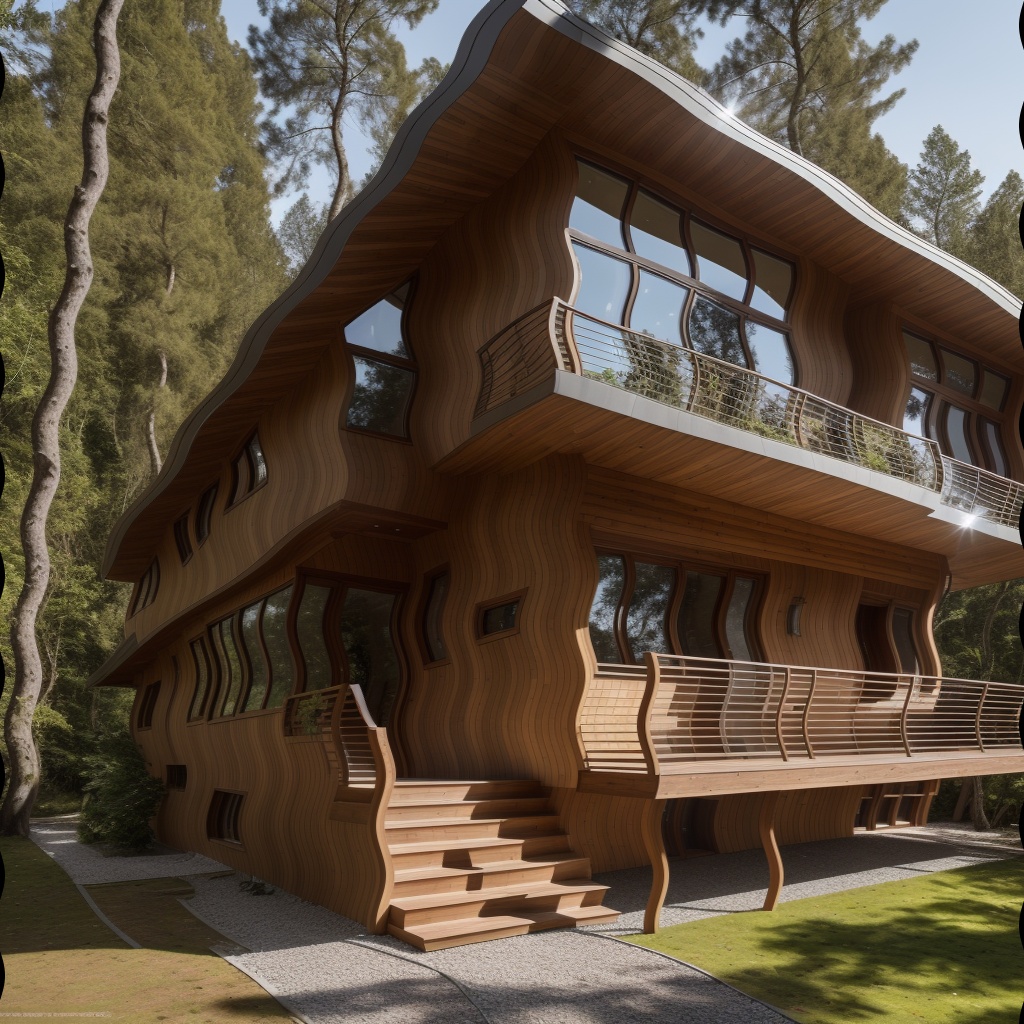
与えられた画像データに正弦波歪を適用し、新しい画像データを生成します。
def apply_image_distortion(image, distortion_factor):
    """
    画像に歪みを適用する関数。

    Parameters:
        image (numpy.ndarray): 入力画像データ (BGRカラー画像)
        distortion_factor (float): 歪みの強さを制御するパラメータ

    Returns:
        numpy.ndarray: 歪みを適用した新しい画像データ
    """
    height, width = image.shape[:2]

    # 変換マップを生成
    map_x = np.zeros((height, width), np.float32)
    map_y = np.zeros((height, width), np.float32)

    for y in range(height):
        for x in range(width):
            map_x[y, x] = x + distortion_factor * np.sin(2 * np.pi * y / 100)
            map_y[y, x] = y

    # 画像を歪曲させる
    distorted_image = cv2.remap(image, map_x, map_y, interpolation=cv2.INTER_LINEAR)

    return distorted_image


# 画像ファイルを読み込み
image = cv2.imread('o:/input_image.jpg')

# 歪曲処理のパラメータ
distortion_factor = 5

# 画像に歪みを適用
image = apply_image_distortion(image, distortion_factor)

# 画像を保存
cv2.imwrite('o:/output_image.jpg', image )
クロップ
画像の一部を切り取って新しい画像を生成します。
def crop_image(image, x, y, width, height):
    """
    与えられた画像データから指定した領域をクロップする関数。

    Parameters:
        image (numpy.ndarray): 入力画像データ (BGRカラー画像)
        x (int): クロップ領域の左上 X 座標
        y (int): クロップ領域の左上 Y 座標
        width (int): クロップ領域の幅
        height (int): クロップ領域の高さ

    Returns:
        numpy.ndarray: クロップされた新しい画像データ
    """
    cropped_image = image[y:y+height, x:x+width]
    return cropped_image

# 画像ファイルを読み込み
image = cv2.imread('o:/input_image.jpg')

# 画像の指定した領域をクロップ
crop_x = 100
crop_y = 50
crop_width = 200
crop_height = 150
image = crop_image(image, crop_x, crop_y, crop_width, crop_height)

# 画像を保存
cv2.imwrite('o:/output_image.jpg', image )
リサイズ
与えられた画像データを指定したサイズにリサイズし、新しい画像データを生成します。
def resize_image(image, new_width, new_height):
    """
    与えられた画像データを指定したサイズにリサイズする関数。

    Parameters:
        image (numpy.ndarray): 入力画像データ (BGRカラー画像)
        new_width (int): リサイズ後の幅
        new_height (int): リサイズ後の高さ

    Returns:
        numpy.ndarray: リサイズされた新しい画像データ
    """
    resized_image = cv2.resize(image, (new_width, new_height))
    return resized_image

# 画像ファイルを読み込み
image = cv2.imread('o:/input_image.jpg')

# 画像を新しいサイズにリサイズ
new_width = 300
new_height = 400
image = resize_image(image, new_width, new_height)

# 画像を保存
cv2.imwrite('o:/output_image.jpg', image )
コントラストと明るさ
与えられた画像のコントラストと明るさを調整し、新しい画像データを生成します。
import cv2
import numpy as np

def adjust_contrast(image, alpha, beta):
    """
    与えられた画像データのコントラストを調整する関数。

    Parameters:
        image (numpy.ndarray): 入力画像データ (BGRカラー画像)
        alpha (float): コントラスト調整係数
        beta (int): 明るさ調整値

    Returns:
        numpy.ndarray: コントラスト調整が適用された新しい画像データ
    """
    adjusted_image = cv2.convertScaleAbs(image, alpha=alpha, beta=beta)
    return adjusted_image

# 画像ファイルを読み込み
image = cv2.imread('o:/input_image.jpg')

# コントラスト調整を適用
contrast_alpha = 2.5  # コントラスト調整係数
contrast_beta = 30    # 明るさ調整値
image = adjust_contrast(image , contrast_alpha, contrast_beta)

# 画像を保存
cv2.imwrite('o:/output_image.jpg', image )
彩度
与えられた画像の彩度を調整し、新しい画像データを生成します。
def adjust_saturation(image, factor):
    """
    与えられた画像データの彩度を調整する関数。

    Parameters:
        image (numpy.ndarray): 入力画像データ (BGRカラー画像)
        factor (float): 彩度調整係数

    Returns:
        numpy.ndarray: 彩度が調整された新しい画像データ
    """
    hsv_image = cv2.cvtColor(image, cv2.COLOR_BGR2HSV)
    hsv_image[:, :, 1] = np.clip(hsv_image[:, :, 1] * factor, 0, 255)
    adjusted_image = cv2.cvtColor(hsv_image, cv2.COLOR_HSV2BGR)
    return adjusted_image


# 画像ファイルを読み込み
image = cv2.imread('o:/input_image.jpg')

# 彩度を変更
saturation_factor = 5.5
image = adjust_saturation(image, saturation_factor)

# 画像を保存
cv2.imwrite('o:/output_image.jpg', image )
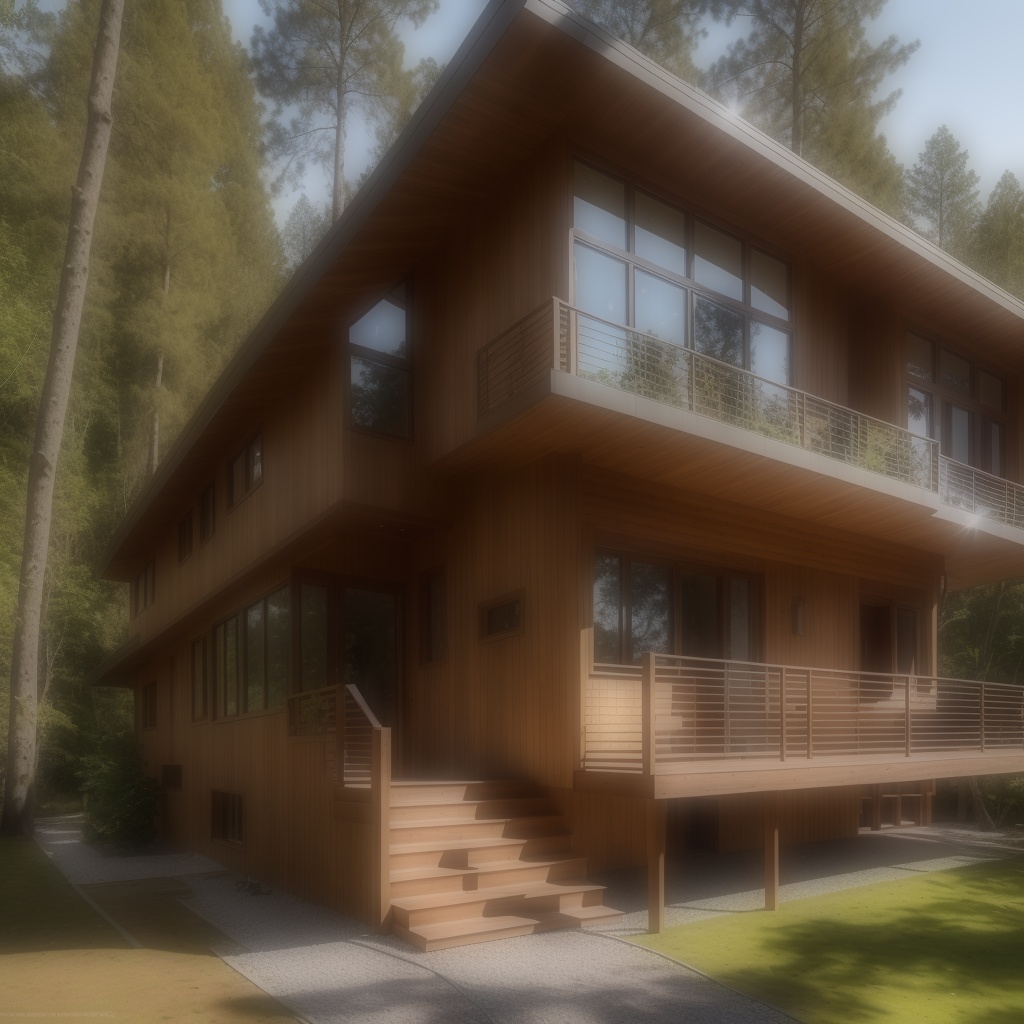
拡散(ディフューザー効果)
オリジナル

画像処理後
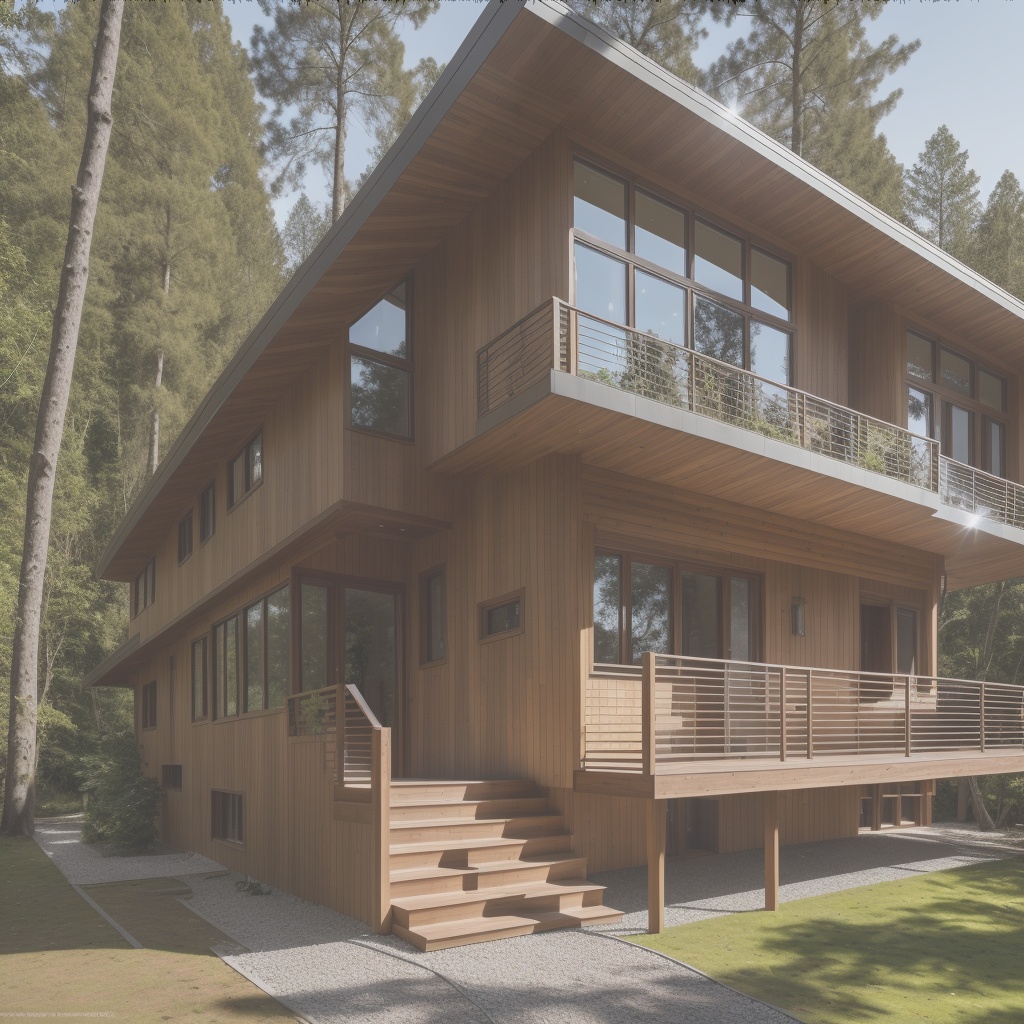
与えられた画像に拡散(ディフューザー効果)を適用し、新しい画像データを生成します。ディフューザー効果とは、光の散乱や拡散をシミュレーションすることによって、画像に柔らかさやぼかしを加えることです。
import cv2
import numpy as np

def apply_diffuser_effect(image, diffuser_intensity=5.5, drop_length=230):
    """
    与えられた画像にディフューザー効果を追加する関数。

    Parameters:
        image (numpy.ndarray): ディフューザー効果を追加する元の画像(BGR形式の3チャンネル画像)。
        diffuser_intensity (float): ディフューザーの強度(0から1の範囲の値)。デフォルトは5.5。
        drop_length (int): ディフューザー効果のノイズの最大長さ。デフォルトは230。

    Returns:
        numpy.ndarray: ディフューザー効果を追加した画像。
    """
    # ノイズを持つディフューザー効果を生成
    height, width, _ = image.shape
    diffuser_noise = np.zeros((height, width, 3), dtype=np.uint8)
    num_drops = int(height * width * diffuser_intensity)
    for _ in range(num_drops):
        x = np.random.randint(0, width)
        y = np.random.randint(0, height)
        length = np.random.randint(5, drop_length)
        thickness = np.random.randint(1, 3)
        color = (200, 200, 200)  # ディフューザー効果の色(灰色)
        cv2.line(diffuser_noise, (x, y), (x, y + length), color, thickness)

    # ディフューザー効果を元の画像に重ねる
    result = cv2.addWeighted(image, 0.7, diffuser_noise, 0.3, 0)

    return result

# 画像ファイルを読み込み
image = cv2.imread('o:/input_image.jpg')

# ディフューザー効果を適用するための引数
diffuser_intensity=0.5
drop_length=20
# ディフューザー効果を適用
image = apply_diffuser_effect(image, diffuser_intensity, drop_length)

# 画像を保存
cv2.imwrite('o:/output_image.jpg', image )
レンズフレア
オリジナル

画像処理後
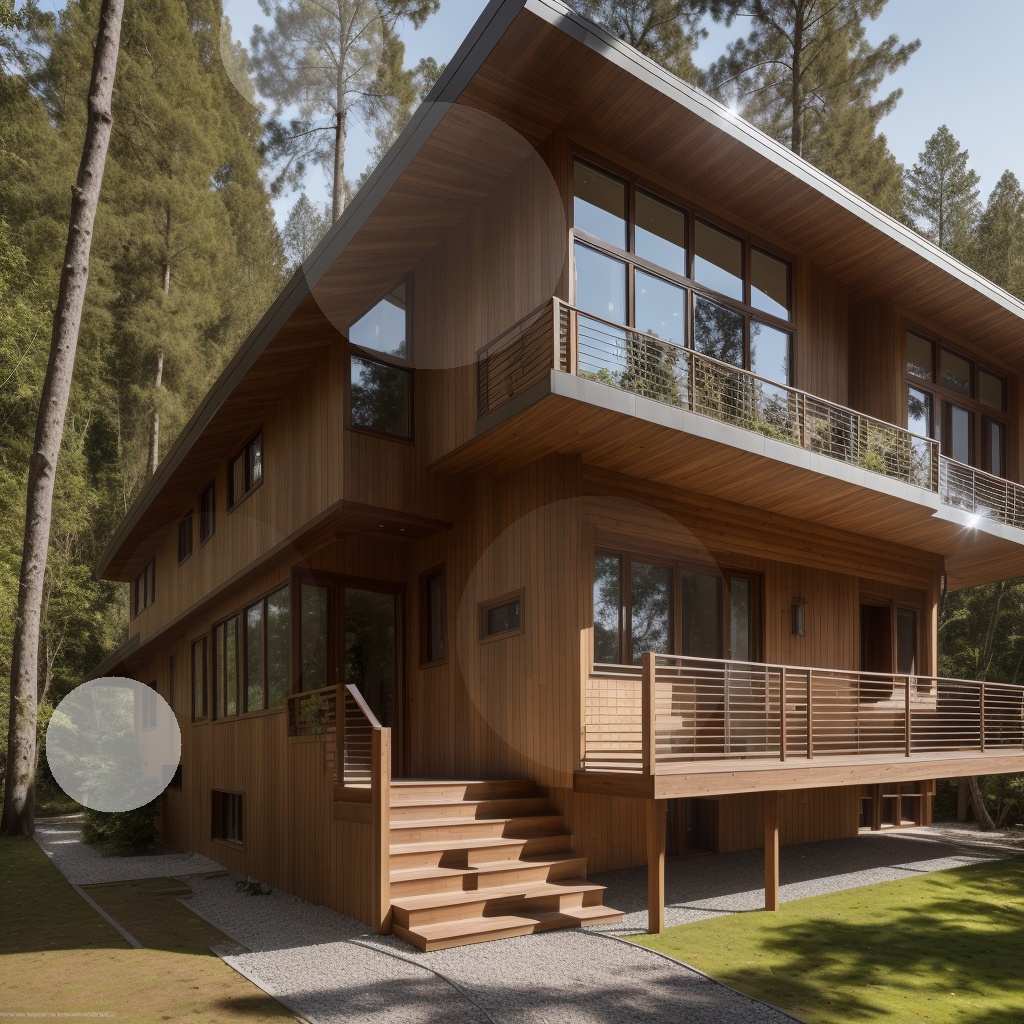
与えられた画像にレンズフレアを追加し、新しい画像データを生成します。レンズフレアは、太陽やライトなどの強い光がレンズに入ることで発生する、レンズのコーティングによって反射や散乱されて生じる現象です。
import cv2
import numpy as np

def apply_lens_flare(image, num_flares=5, flare_intensity=0.5):
    """
    与えられた画像にレンズフレア効果を追加する関数。

    Parameters:
        image (numpy.ndarray): レンズフレア効果を追加する元の画像(BGR形式の3チャンネル画像)。
        num_flares (int): 生成するレンズフレアの数。デフォルトは5。
        flare_intensity (float): レンズフレアの強度(0から1の範囲の値)。デフォルトは0.5。

    Returns:
        numpy.ndarray: レンズフレア効果を追加した画像。
    """
    result = image.copy()
    height, width, _ = image.shape

    for _ in range(num_flares):
        x = np.random.randint(0, width)
        y = np.random.randint(0, height)
        flare_color = (255, 255, 255)  # レンズフレアの色(白色)
        flare_radius = np.random.randint(50, 150)
        flare_opacity = int(flare_intensity * 255)
        cv2.circle(result, (x, y), flare_radius, flare_color, -1)
        cv2.addWeighted(image, 1 - flare_intensity, result, flare_intensity, 0, result)

    return result

# 画像ファイルを読み込み
image = cv2.imread('o:/input_image.jpg')

# レンズフレアを適用するための引数
num_flares = 5
flare_intensity = 0.5

# レンズフレアを適用
image = apply_lens_flare(image, num_flares, flare_intensity)

# 画像を保存
cv2.imwrite('o:/output_image.jpg', image )
影
オリジナル

画像処理後
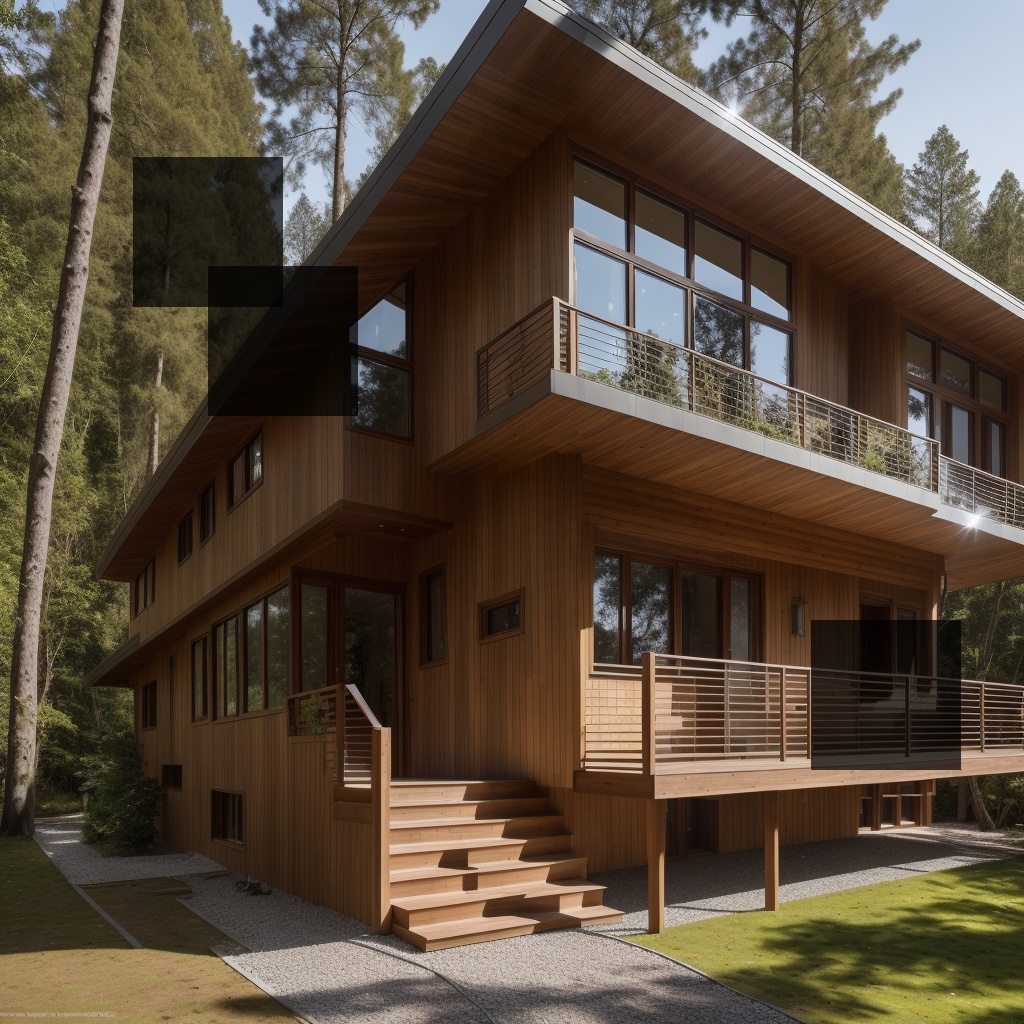
与えられた画像に指定したサイズと数の影を追加し、新しい画像データを生成します。
import cv2
import numpy as np


def add_colored_shadows(image, num_shadows=1, shadow_size=(100, 100), shadow_color=(0, 0, 0), shadow_opacity=0.5):
    shadowed_image = image.copy()

    height, width, _ = image.shape
    for _ in range(num_shadows):
        x1 = np.random.randint(0, width - shadow_size[0])
        y1 = np.random.randint(0, height - shadow_size[1])
        x2 = x1 + shadow_size[0]
        y2 = y1 + shadow_size[1]
        shadow_mask = np.zeros((height, width, 3), dtype=np.float32)
        shadow_mask[y1:y2, x1:x2, :] = shadow_opacity

        for channel in range(3):
            shadowed_image[y1:y2, x1:x2, channel] = (1 - shadow_mask[y1:y2, x1:x2, channel]) * shadowed_image[y1:y2, x1:x2, channel] + shadow_mask[y1:y2, x1:x2, channel] * shadow_color[channel]

    return shadowed_image

# 画像ファイルを読み込み
image = cv2.imread('o:/input_image.jpg')

num_shadows = 3            # 影の数
shadow_size = (150, 150)   # 影のサイズ (幅, 高さ)
shadow_color = (0, 0, 0)   # 影の色 (BGR形式)
shadow_opacity = 0.7       # 影の透明度(0から1の範囲)
image = add_colored_shadows(image, num_shadows, shadow_size, shadow_color, shadow_opacity)

# 画像を保存
cv2.imwrite('o:/output_image.jpg', image )
ノイズ追加(ガウシアン)
与えられた画像にガウシアンノイズを追加し、新しい画像データを生成します。
def add_gaussian_noise(image, mean=0, std=25):
    """
    与えられた画像データにガウシアンノイズを追加する関数。

    Parameters:
        image (numpy.ndarray): 入力画像データ (BGRカラー画像)
        mean (int): ガウシアンノイズの平均値
        std (int): ガウシアンノイズの標準偏差

    Returns:
        numpy.ndarray: ノイズが追加された新しい画像データ
    """
    row, col, ch = image.shape
    gauss = np.random.normal(mean, std, (row, col, ch))
    noisy_image = np.clip(image + gauss, 0, 255).astype(np.uint8)
    return noisy_image

# 画像ファイルを読み込み
image = cv2.imread('o:/input_image.jpg')

# ガウシアンノイズを追加
image = add_gaussian_noise(image)

# 画像を保存
cv2.imwrite('o:/output_image.jpg', image )
ノイズ追加(塩・胡椒=ソルト・ペッパーノイズ)
与えられた画像に塩・胡椒ノイズを追加し、新しい画像データを生成します。
def add_salt_and_pepper_noise(image, amount=0.02):
    """
    与えられた画像データに塩・コショウノイズを追加する関数。

    Parameters:
        image (numpy.ndarray): 入力画像データ (BGRカラー画像)
        amount (float): ノイズの割合

    Returns:
        numpy.ndarray: ノイズが追加された新しい画像データ
    """
    row, col, ch = image.shape
    noisy_image = np.copy(image)
    num_pixels = int(amount * row * col)

    # 塩ノイズ (白点)
    coords = [np.random.randint(0, i - 1, num_pixels) for i in image.shape]
    noisy_image[coords[0], coords[1], :] = 255

    # コショウノイズ (黒点)
    coords = [np.random.randint(0, i - 1, num_pixels) for i in image.shape]
    noisy_image[coords[0], coords[1], :] = 0

    return noisy_image

# 画像ファイルを読み込み
image = cv2.imread('o:/input_image.jpg')

# 塩・コショウノイズを追加
image = add_salt_and_pepper_noise(image)

# 画像を保存
cv2.imwrite('o:/output_image.jpg', image )
ぼかし(ガウシアン)
与えられた画像データにガウシアンぼかしを適用し、新しい画像データを生成します。
def apply_gaussian_blur(image, kernel_size=(5, 5), sigma=0):
    """
    与えられた画像データにガウシアンぼかしを適用する関数。

    Parameters:
        image (numpy.ndarray): 入力画像データ (BGRカラー画像)
        kernel_size (tuple): カーネルサイズ (幅, 高さ)
        sigma (float): ガウス分布の標準偏差

    Returns:
        numpy.ndarray: ぼかしが適用された新しい画像データ
    """
    blurred_image = cv2.GaussianBlur(image, kernel_size, sigma)
    return blurred_image

# 画像ファイルを読み込み
image = cv2.imread('o:/input_image.jpg')

# ガウシアンぼかしを適用
kernel_size = (15, 15)
sigma = 0
image = apply_gaussian_blur(image, kernel_size=kernel_size, sigma=sigma)

# 画像を保存
cv2.imwrite('o:/output_image.jpg', image )
ぼかし(メディアン)
与えられた画像データにメディアンぼかしを適用し、新しい画像データを生成します。
def apply_median_blur(image, kernel_size=5):
    """
    与えられた画像データにメディアンぼかしを適用する関数。

    Parameters:
        image (numpy.ndarray): 入力画像データ (BGRカラー画像)
        kernel_size (int): カーネルサイズ。デフォルトは 5

    Returns:
        numpy.ndarray: ぼかしが適用された新しい画像データ
    """
    blurred_image = cv2.medianBlur(image, kernel_size)
    return blurred_image

# 画像ファイルを読み込み
image = cv2.imread('o:/input_image.jpg')

# メディアンぼかしを適用
kernel_size = 7
image = apply_median_blur(image, kernel_size=kernel_size)

# 画像を保存
cv2.imwrite('o:/output_image.jpg', image )
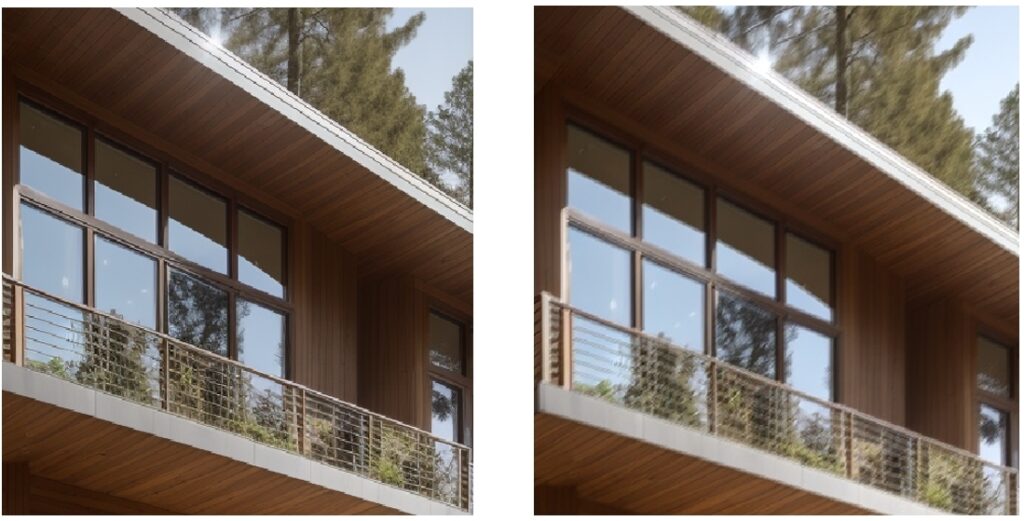
手振れ(モーションブラー)
与えられた画像に、手振れや物体の運動によって生じるぼけを適用し新しい画像データを生成します。ます。画像のサイズによってカーネルサイズを調整する必要がります。カーネルサイズが大きすぎると、真っ黒になったり真っ白になることがあります。
def apply_motion_blur(image, kernel_size, angle):
    """
    与えられた画像データにモーションブラーを適用する関数。

    Parameters:
        image (numpy.ndarray): 入力画像データ (BGRカラー画像)
        kernel_size (int): カーネルサイズ
        angle (float): ブラーの方向(度数法)

    Returns:
        numpy.ndarray: モーションブラーが適用された新しい画像データ
    """
    kernel = create_motion_blur_kernel(kernel_size, angle)
    blurred_image = cv2.filter2D(image, -1, kernel)
    return blurred_image

def create_motion_blur_kernel(kernel_size, angle):
    """
    モーションブラーのためのカーネルを生成する関数。

    Parameters:
        kernel_size (int): カーネルサイズ
        angle (float): ブラーの方向(度数法)

    Returns:
        numpy.ndarray: モーションブラー用のカーネル
    """
    kernel = np.zeros((kernel_size, kernel_size))
    angle_rad = np.deg2rad(angle)
    center = (kernel_size - 1) / 2

    for i in range(kernel_size):
        x = i - center
        for j in range(kernel_size):
            y = j - center
            kernel[i, j] = (1.0 / kernel_size) * (1.0 - abs(x * np.cos(angle_rad) + y * np.sin(angle_rad)))

    return kernel


# 画像ファイルを読み込み
image = cv2.imread('o:/input_image.jpg')

# モーションブラーを適用
motion_kernel_size = 3  # カーネルサイズ。
motion_angle = 45.0     # ブラーの方向(度数法)
image = apply_motion_blur(image, motion_kernel_size, motion_angle)

# 画像を保存
cv2.imwrite('o:/output_image.jpg', image )
画像が小さいため、モーションブラーが掛かっているか分かり難いので、拡大してみました。
霧
与えられた画像データに霧の効果を適用し、新しい画像データを生成します。
def apply_fog_effect(image, fog_intensity=0.5):
    """
    与えられた画像に霧のエフェクトを追加する関数。

    Parameters:
        image (numpy.ndarray): 霧のエフェクトを追加する元の画像(BGR形式の3チャンネル画像)。
        fog_intensity (float): 霧の強度(0から1の範囲の値)。デフォルトは0.5。

    Returns:
        numpy.ndarray: 霧のエフェクトを追加した画像。
    """
    # 背景をぼかす
    blurred_image = cv2.GaussianBlur(image, (101, 101), 0)

    # 霧のエフェクトを適用
    result = cv2.addWeighted(image, 1 - fog_intensity, blurred_image, fog_intensity, 0)

    return result

# 画像ファイルを読み込み
image = cv2.imread('o:/input_image.jpg')

# 霧のエフェクトを適用するための引数
fog_intensity = 0.7

# 霧のエフェクトを適用
image = apply_fog_effect(image, fog_intensity)

# 画像を保存
cv2.imwrite('o:/output_image.jpg', image )
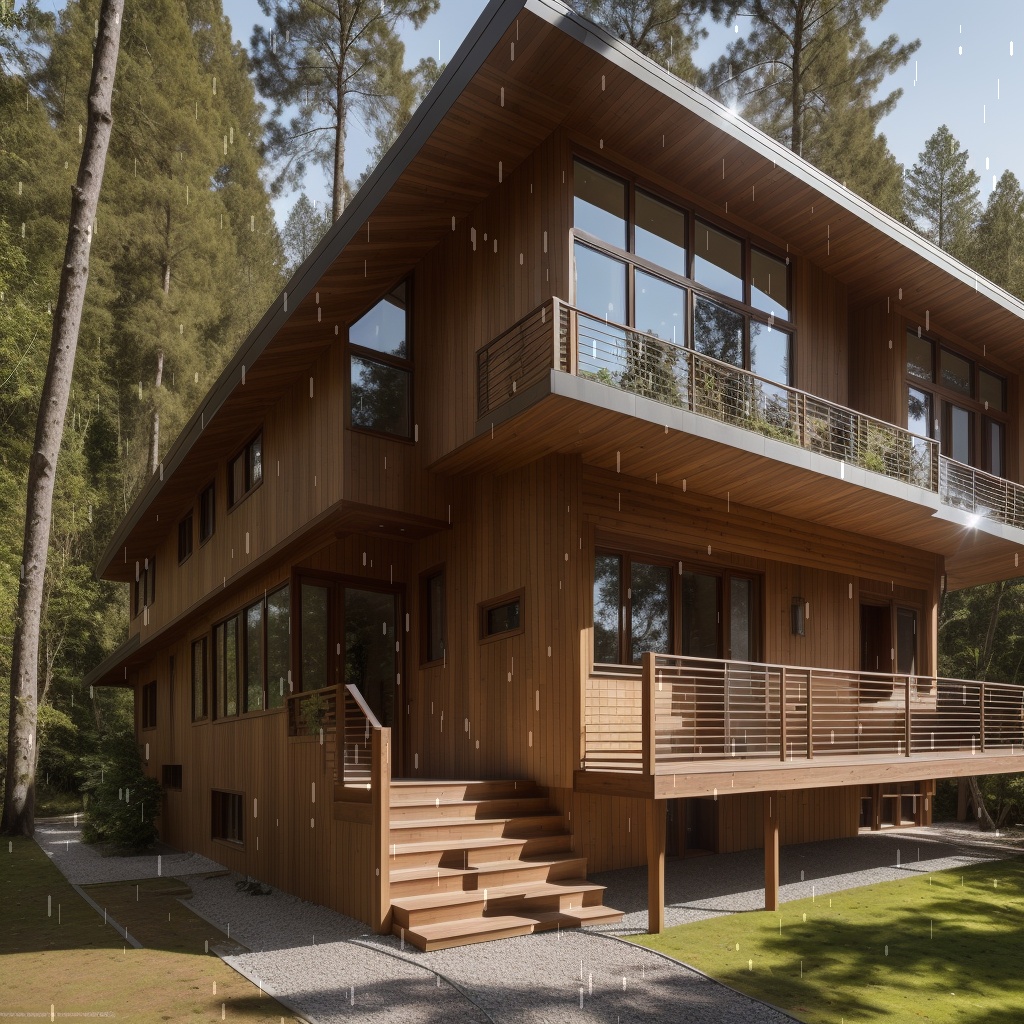
雨(雨粒)
与えられた画像データに雨粒の効果を適用し、新しい画像データを生成します。
import cv2
import numpy as np

def apply_rain_effect(image, rain_intensity=0.5, drop_length=10, drop_opacity=0.7, num_drops=100):
    """
    与えられた画像に雨効果を追加する関数。

    Parameters:
        image (numpy.ndarray): 雨効果を追加する元の画像(BGR形式の3チャンネル画像)。
        rain_intensity (float): 雨の強度(0から1の範囲の値)。デフォルトは0.5。
        drop_length (int): 雨滴の最大長さ。デフォルトは10。
        drop_opacity (float): 雨滴の透明度(0から1の範囲の値)。デフォルトは0.7。
        num_drops (int): 生成する雨滴の数。デフォルトは100。

    Returns:
        numpy.ndarray: 雨効果を追加した画像。
    """
    # 雨の効果を持つノイズを生成
    height, width, _ = image.shape
    rain_drops = np.zeros((height, width, 4), dtype=np.uint8)  # 4チャンネル画像(RGBA)

    for _ in range(num_drops):
        x = np.random.randint(0, width)
        y = np.random.randint(0, height)
        length = np.random.randint(5, drop_length)
        thickness = np.random.randint(1, 3)
        alpha = int(drop_opacity * 255)  # 透明度をアルファ値に変換
        color = (200, 200, 200, alpha)  # 雨滴の色と透明度(灰色)
        cv2.line(rain_drops, (x, y), (x, y + length), color, thickness)


    # 雨効果を元の画像に重ねる
    result = cv2.addWeighted(image, 1.0, rain_drops[:, :, :3], 0.3, 0)  # アルファチャンネルを除外

    return result

# 画像ファイルを読み込み
image = cv2.imread('o:/input_image.jpg')

# 雨効果を適用するための引数
rain_intensity = 0.5
drop_length = 20
drop_opacity = 0.7
num_drops = 300

# 雨効果を適用
image = apply_rain_effect(image, rain_intensity, drop_length, drop_opacity, num_drops)

# 画像を保存
cv2.imwrite('o:/output_image.jpg', image )
データ拡張のサンプル
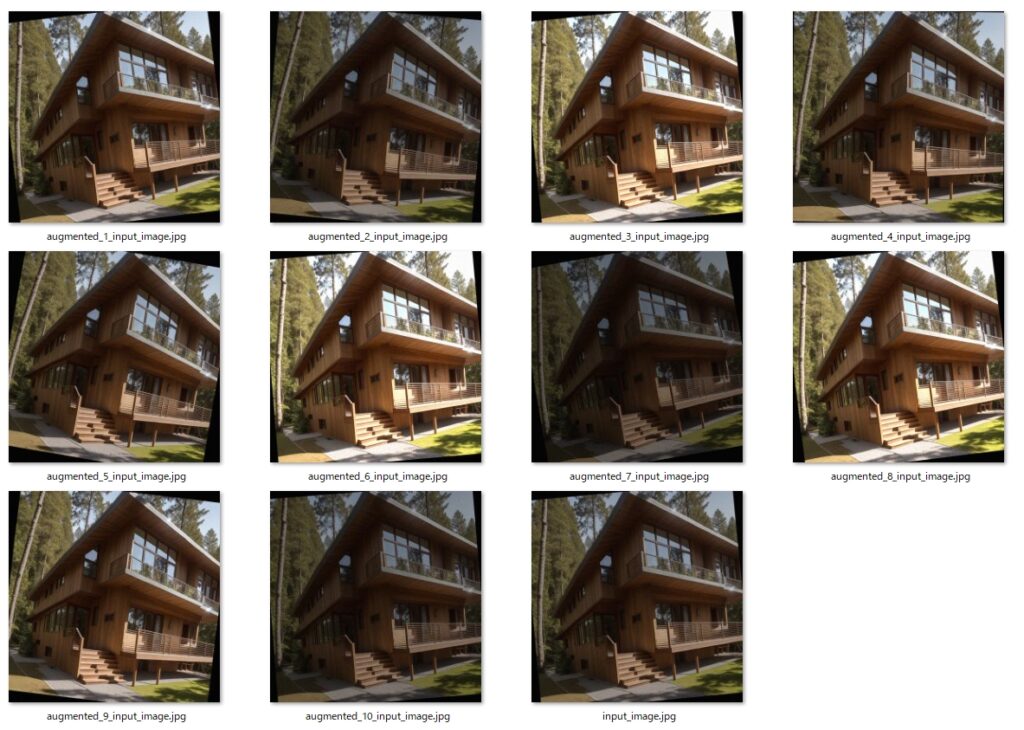
参考までに、簡易的なデータ拡張のサンプルを紹介しておきます。このプログラムは人がカメラで撮影した場合を想定した画像処理を行っています。
具体的には、朝、昼、夕方の明るさ調整、曇り空のノイズ追加、カメラの角度と手振れのシミュレーション、高感度撮影時のノイズを組み合わせて生成しています。
現在のパラメータで生成される画像は画質が荒いので、必要に応じて各機能の有効/無効、パラメータを調整をお願いします。
import cv2
import os
import numpy as np
from PIL import Image

class Augmentation:
    def __init__(self):
        self.is_brightness = True
        self.is_noise = True
        self.is_tilt = True
        self.is_shake = True
        self.is_focus = True
        self.is_zoom = True
        self.is_trimming = True
        self.is_gray = False

        self.brightness_limit = 1.5
        self.noise_limit = 10
        self.tilt_limit = 15
        self.shake_limit = 7
        self.focus_limit = 20
        self.zoom_limit = 2

    def image_augmentation(self,image):
        """
        シミュレーションされたデータ拡張を適用する
        """

        # 画像のサイズを保存
        height, width, _ = image.shape

        # グレースケール化
        if self.is_gray :
            image = cv2.cvtColor(image, cv2.COLOR_BGR2GRAY)

        # 朝、昼、夕方の明るさ調整
        if self.is_brightness :
            brightness_factor = np.random.uniform(0.5, self.brightness_limit)
            image = cv2.convertScaleAbs(image, alpha=brightness_factor, beta=0)

        # 高感度撮影ノイズ
        if self.is_noise :
            noise = np.random.normal(0, self.noise_limit , image.shape).astype(int)
            image = np.clip(image + noise, 0, 255).astype(np.uint8)

        # 手振れのシミュレーション
        if self.is_shake :
            kernel_size = np.random.randint(3,self.shake_limit)  # ブラーカーネルのサイズをランダムに選択
            motion_blur_kernel = np.zeros((kernel_size, kernel_size))
            motion_blur_kernel[int((kernel_size-1)/2), :] = np.ones(kernel_size)
            motion_blur_kernel = motion_blur_kernel / kernel_size
            image = cv2.filter2D(image, -1, motion_blur_kernel)

        # ピンボケのシミュレーション
        if self.is_focus:
            sigma = np.random.randint(1, (self.focus_limit // 2) + 1) * 2 - 1
            image = cv2.GaussianBlur(image, (0, 0), sigmaX=sigma )  # sigmaXの値を調整

        # カメラ角度のシミュレーション
        if self.is_tilt :
            rotation_angle = np.random.uniform(-1 * self.tilt_limit, self.tilt_limit)
            rotation_matrix = cv2.getRotationMatrix2D((image.shape[1] / 2, image.shape[0] / 2), rotation_angle, 1)
            image = cv2.warpAffine(image, rotation_matrix, (image.shape[1], image.shape[0]))

            # 回転に伴う黒い部分をカット
            if self.is_trimming :
                crop_percent = 0.1
                image = image[int(image.shape[0] * crop_percent):int(image.shape[0] * (1 - crop_percent)),
                                    int(image.shape[1] * crop_percent):int(image.shape[1] * (1 - crop_percent))]

        # ズーム又は距離による画像拡大/縮小シミュレーション
        if self.is_zoom:
            random_zoom_factor = np.random.uniform(0.7, self.zoom_limit)
            image = cv2.resize(image, (int(width * random_zoom_factor), int(height * random_zoom_factor)))
            image = self.crop_center(image,width,height)

        # 元のサイズに戻す
        image = cv2.resize(image, (width,height))

        return image


    def crop_center(self,image_data, target_width, target_height):
        """
        画像データを中心を起点にして指定したサイズでクロップする関数。
        元画像より小さい場合は、元のサイズを保持する。

        Parameters:
            image_data (numpy.ndarray): クロップする画像データ(NumPyの配列)。
            target_width (int): クロップする横幅。
            target_height (int): クロップする縦幅。

        Returns:
            numpy.ndarray: クロップされた画像データ(NumPyの配列)。
        """
        # 画像のサイズを取得
        image_height, image_width = image_data.shape[:2] if len(image_data.shape) == 3 else image_data.shape

        # クロップする領域の座標を計算
        start_x = max(0, (image_width - target_width) // 2)
        start_y = max(0, (image_height - target_height) // 2)
        end_x = min(image_width, start_x + target_width)
        end_y = min(image_height, start_y + target_height)

        # 元画像より小さい場合は、元のサイズを保持
        if end_x - start_x < target_width:
            start_x = max(0, end_x - target_width)
        if end_y - start_y < target_height:
            start_y = max(0, end_y - target_height)

        # 画像をカット(切り抜き)
        cropped_image = image_data[start_y:end_y, start_x:end_x]

        return cropped_image

    def generation(self,input_image, output_folder, count):
        """
        指定フォルダ内の画像にシミュレーションされたデータ拡張を適用して結果を出力フォルダに保存する関数。

        Parameters:
            input_folder (str): 入力フォルダのパス
            output_folder (str): 出力フォルダのパス
            num_augmented_images (int): 生成枚数
        """

        if input_image is None:
            return

        if not os.path.exists(output_folder):
            os.makedirs(output_folder)

        for i in range(count):
            augmented_image = self.image_augmentation(input_image)
            output_filename = f"augmentation_{i + 1}.jpg"
            output_path = os.path.join(output_folder, output_filename)
            cv2.imwrite(output_path, augmented_image)

    def generations(self,input_folder, output_folder, count):
        """
        指定フォルダ内の画像にシミュレーションされたデータ拡張を適用して結果を出力フォルダに保存する関数。

        Parameters:
            input_folder (str): 入力フォルダのパス
            output_folder (str): 出力フォルダのパス
            num_augmented_images (int): 生成枚数
        """
        if not os.path.exists(output_folder):
            os.makedirs(output_folder)

        for filename in os.listdir(input_folder):
            if filename.endswith(".jpg") or filename.endswith(".png"):
                input_path = os.path.join(input_folder, filename)
                image = cv2.imread(input_path)
                basename, extension = os.path.splitext(filename)
                for i in range(count):
                    augmented_image = self.image_augmentation(image)
                    output_filename = f"{basename}_{i + 1}{extension}"
                    output_path = os.path.join(output_folder, output_filename)
                    cv2.imwrite(output_path, augmented_image)

    def load_images(self,folder_path):
        """
        指定したフォルダ内の画像ファイルを読み込んでリストに追加して返す関数。

        Parameters:
            folder_path (str): 画像が保存されているフォルダのパス。

        Returns:
            list: 画像ファイルがPILオブジェクトとして格納されたリスト。
        """
        image_list = []

        # 指定したフォルダ内のファイルを全て取得
        for filename in os.listdir(folder_path):
            # ファイルが画像形式かどうかを確認
            if filename.lower().endswith(('.png', '.jpg', '.jpeg', '.gif', '.bmp')):
                img_path = os.path.join(folder_path, filename)

                # 画像を開いてリストに追加
                try:
                    img = Image.open(img_path)
                    image_list.append(img)
                except Exception as e:
                    print(f"Error loading image {img_path}: {e}")

        return image_list


if __name__ == "__main__":
    aug = Augmentation()

    # パラメータ設定
    input_folder = 'o:/input_images'    # 入力フォルダのパス
    output_folder = 'o:/output_images'  # 出力フォルダのパス
    num_augmented_images
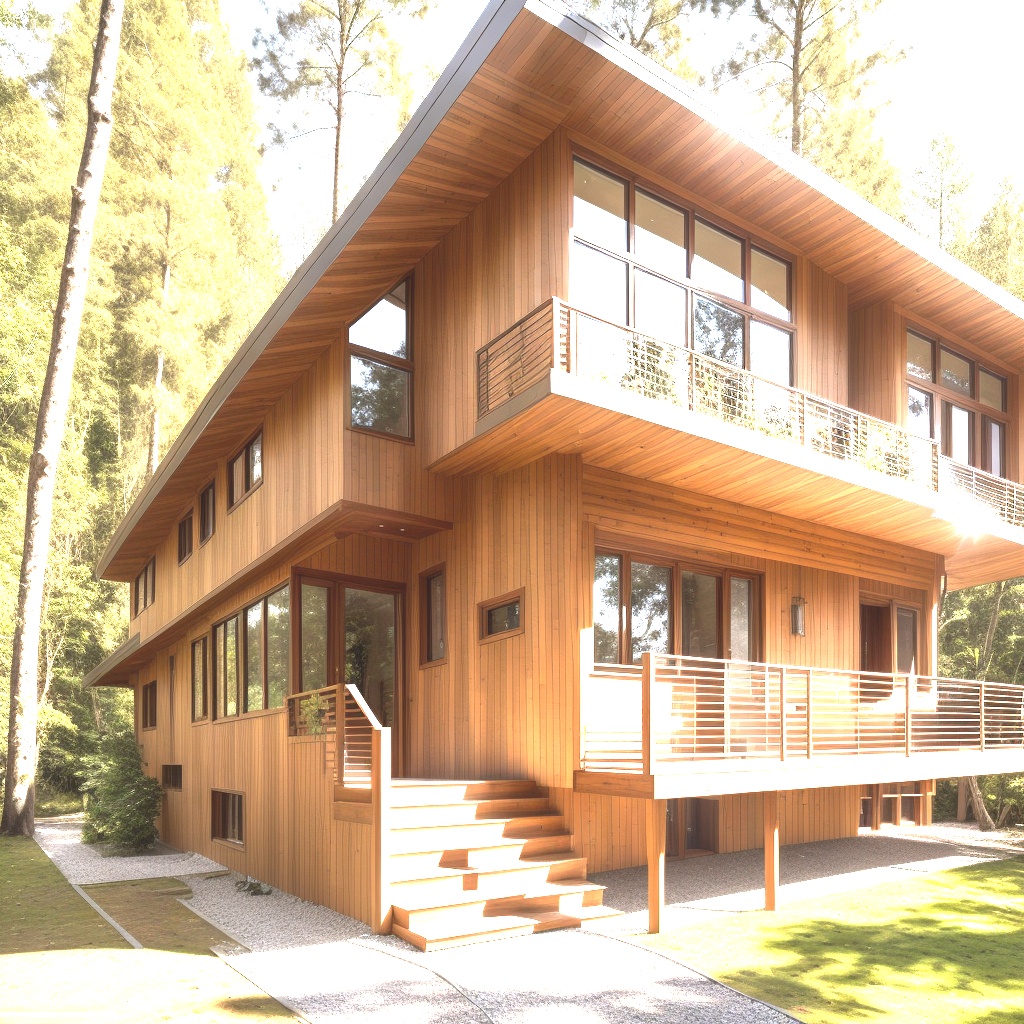
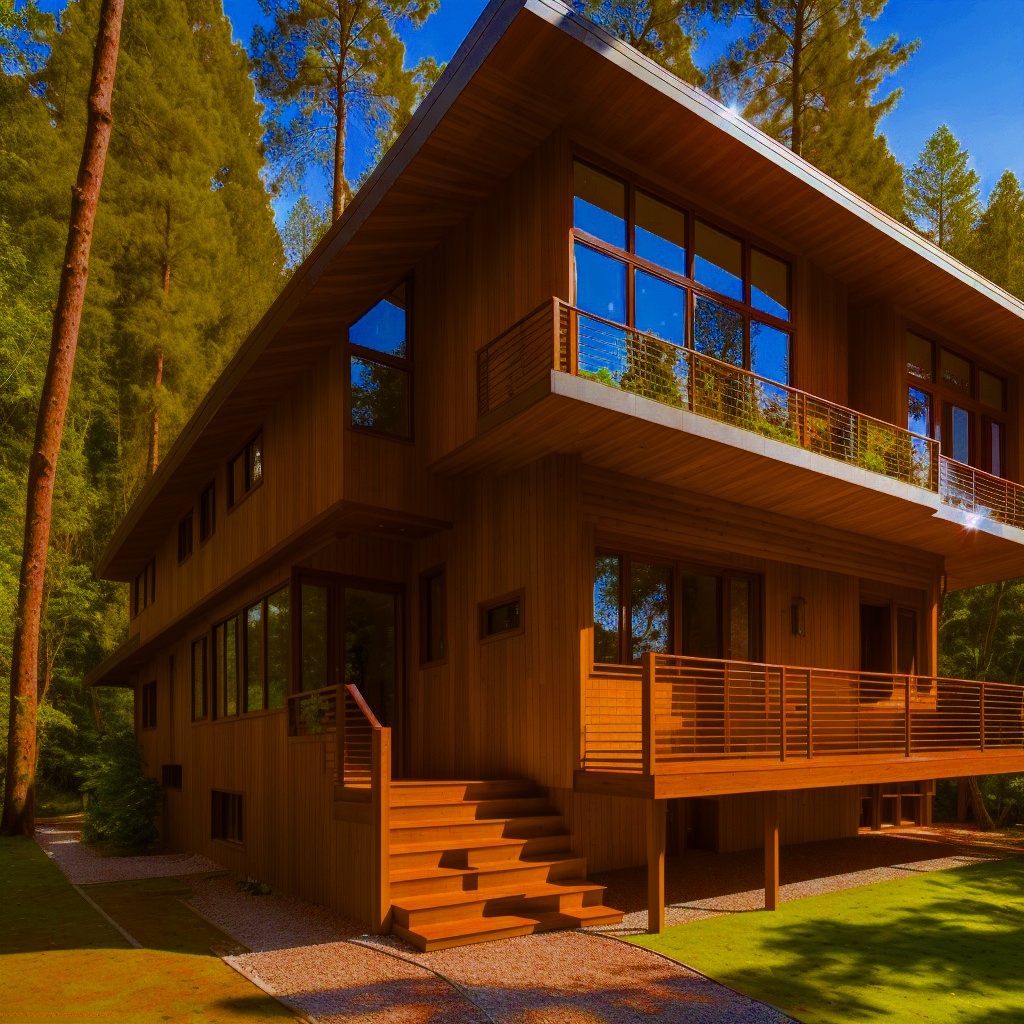
実行した結果は以下の通りです。今回は生成枚数に10を指定したので、出力フォルダには10枚の写真が生成されています。
まとめ
今回は、Image Augmentation(画像の水増し、データ拡張)に使える OpenCV の画像処理について、代表的なものを一通り紹介しました。
それぞれ関数化していますので、コピペしてすぐにお使いいただけると思います。
実際にImage Augmentationを行うには、元の画像データに対して今回紹介した画像処理をランダムに適宜し、結果を指定フォルダに保存するプログラムを作る必要がありますが、簡易版のサンプルソースも紹介させて頂きました。
ディープラーニングで画像データの水増し(データ拡張)が必要な場合は、是非この記事を参考にして下さい。







コメント